> ## Documentation Index
> Fetch the complete documentation index at: https://support.pexcard.com/llms.txt
> Use this file to discover all available pages before exploring further.
# Create PEX tags for CMiC
> PEX Tag manager is your one stop shop to sync CMiC fields with PEX tags. Each PEX tag corresponds to a CMiC field. The connector can auto pull in your Job/Dept/Eqp., Cost Code/Account/Category, Cost Type/Tran Code from CMiC, so you don’t have to add them manually in PEX.
Once they’re in PEX, you can easily code/tag transactions before they sync to CMiC. They will then sync to CMiC with the correct Job/Dept/Eqp., Cost Code/Account/Category, Cost Type/Tran Code.
Log in to [http://dashboard.pexcard.com/](http://dashboard.pexcard.com/?utm_source=support)
Go to [Business Settings -> Tag manager](https://dashboard.pexcard.com/business-settings/tags?utm_source=support)
Click **Add Tag**.
Select **Dropdown** as the type.
Enter a name: **Job/Dept/Eqp.**
Optionally, add a description like "Job/Dept/Eqp.**"**
Check **Enabled** to make this tag visible on transactions.
Choose whether or not this tag is required.
* If the "Required" checkbox is checked, cardholders must tag a transaction with it.
Click **Save tag** to finish.
* The new tag will appear on the Tag Manager page.
Create tags for **Cost Code/Account/Category** and **Cost Type/Tran Code** following the same steps above.
* You will have three PEX tags: one for Job/Dept/Eqp., one for Cost Code/Account/Category, and one for Cost Type/Tran Code.
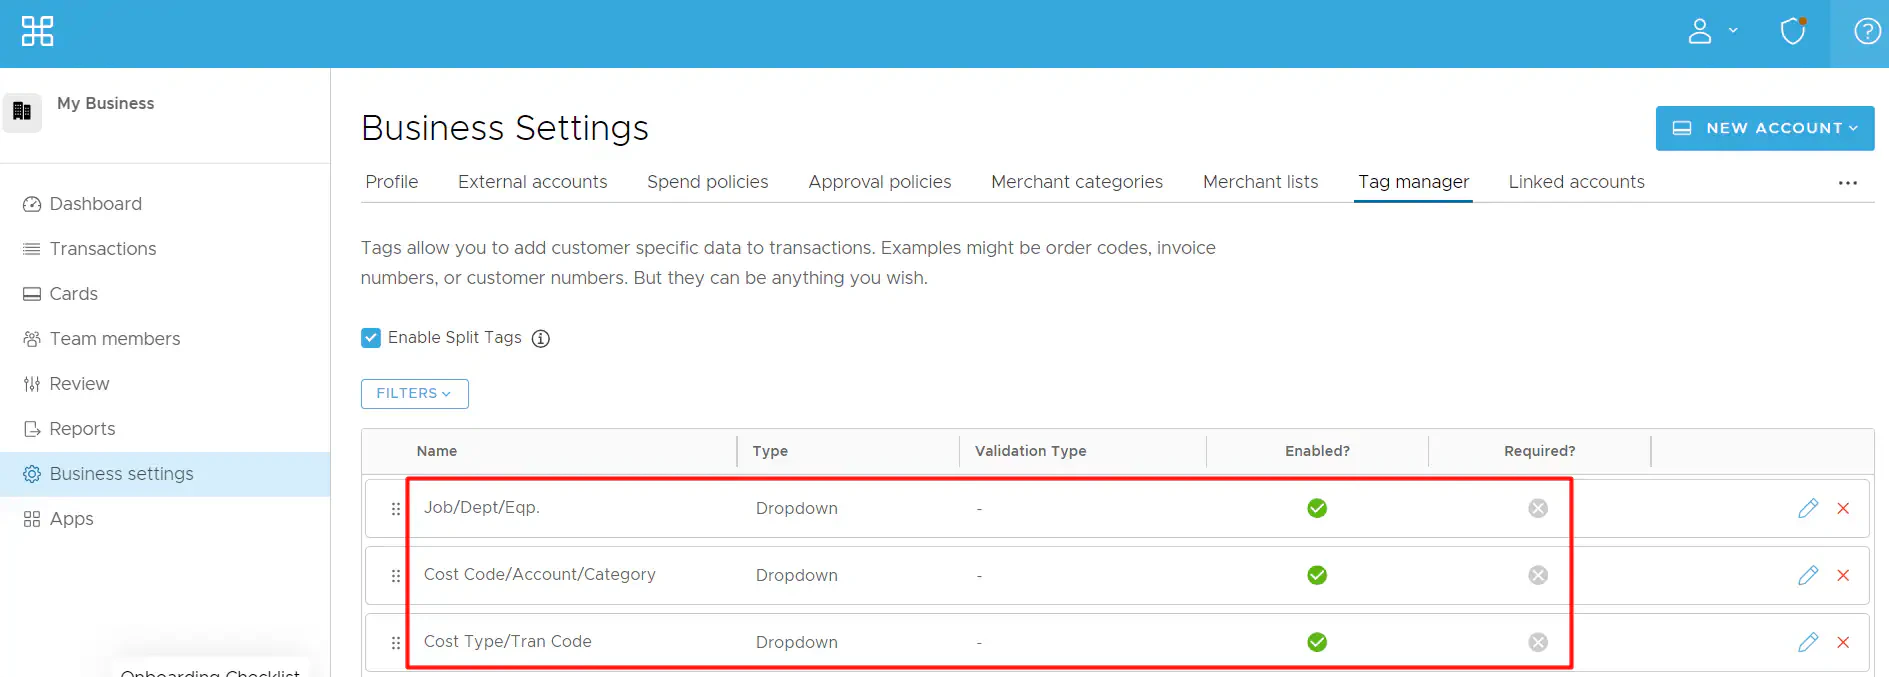 Once the tags are set up, you will also see them:
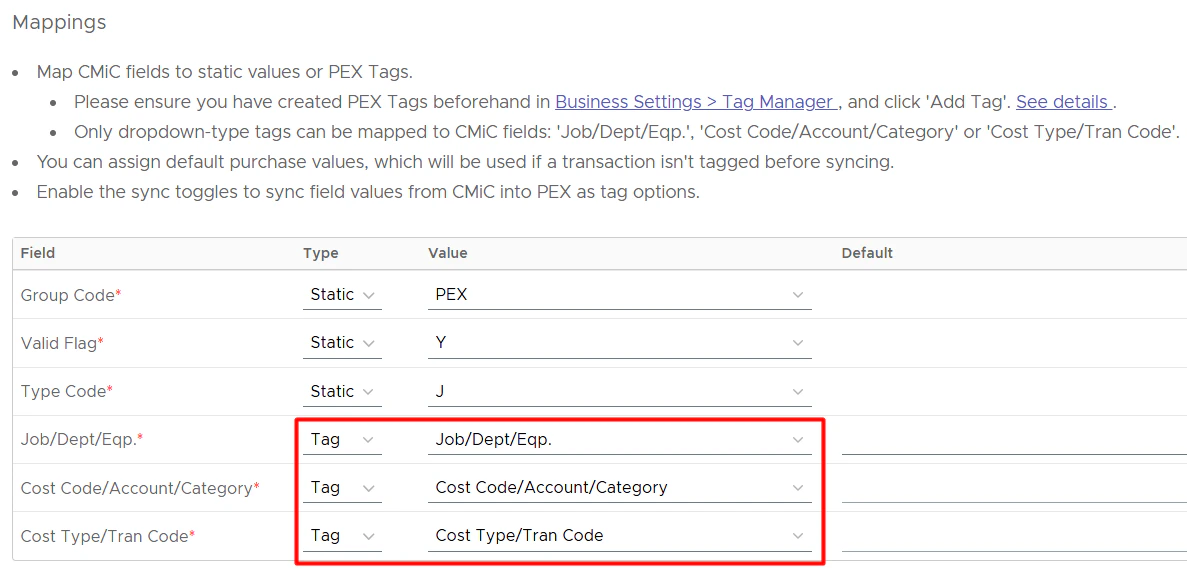
* In the dropdown lists of the **Mappings** table so you can do the mapping.
Once the tags are set up, you will also see them:
* In the dropdown lists of the **Mappings** table so you can do the mapping.
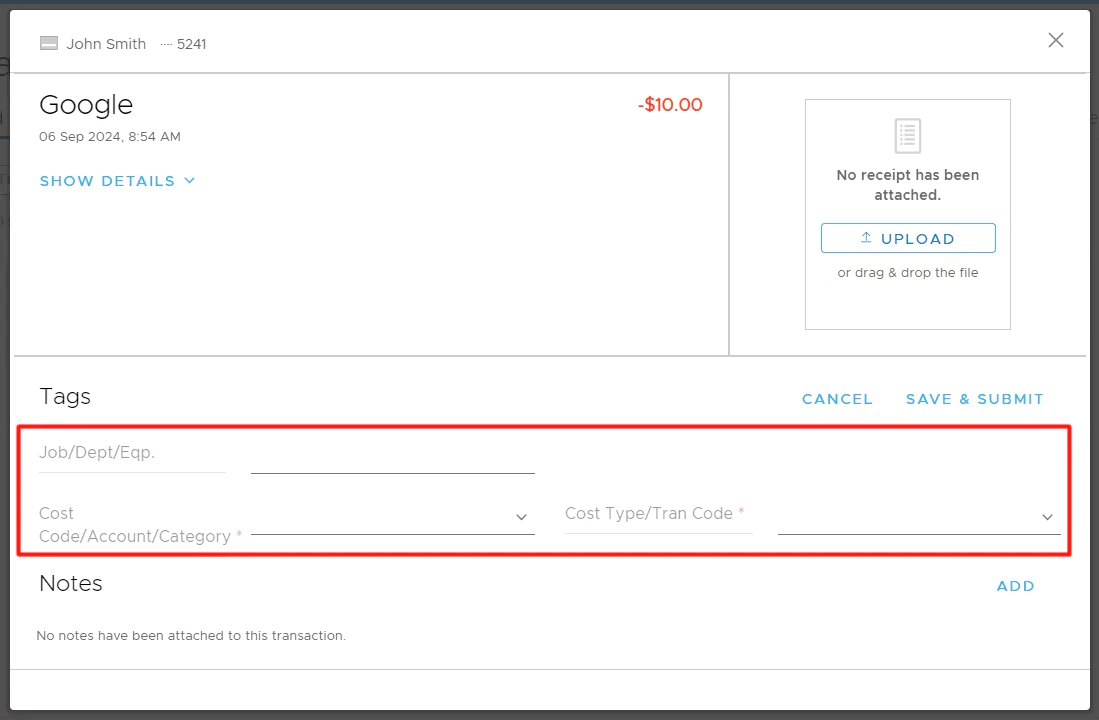
 * On the PEX transaction details screen, so you and your Cardholders can tag transactions.