> ## Documentation Index
> Fetch the complete documentation index at: https://support.pexcard.com/llms.txt
> Use this file to discover all available pages before exploring further.
# Enable Sage Intacct settings for PEX sync
> Enable Sage Intacct settings for PEX sync: document numbering, sender ID, web services user, and general ledger.
## Step 1: Set up Document Numbering
Ensure document numbering is set up on your Sage account to ensure the transaction receipts port over correctly.
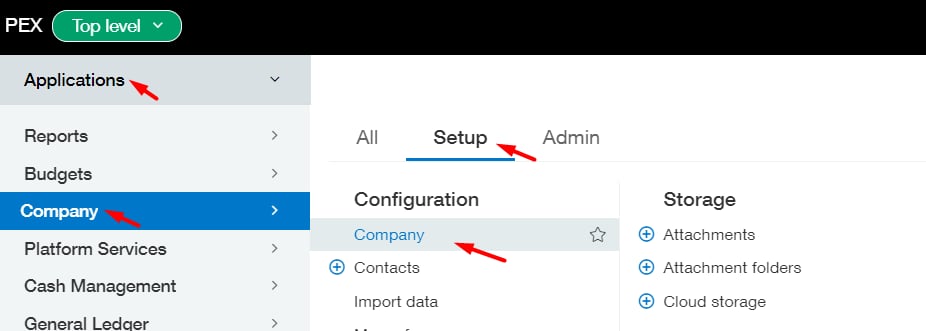
Navigate to **Applications** > **Company** > **Setup tab** > **Company** > **General Information tab.**
 Click **Edit.**
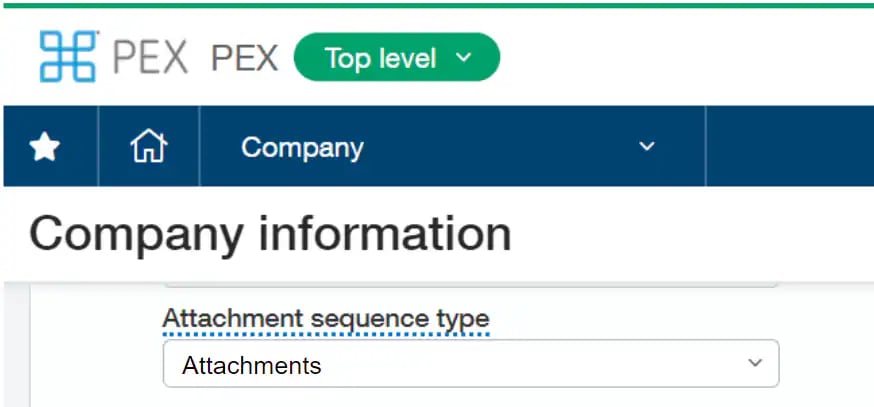
Ensure the **Attachments sequence type** is set to "Attachments", which will automatically create a unique number for each attachment.
Click **Edit.**
Ensure the **Attachments sequence type** is set to "Attachments", which will automatically create a unique number for each attachment.
 Click **Save**.
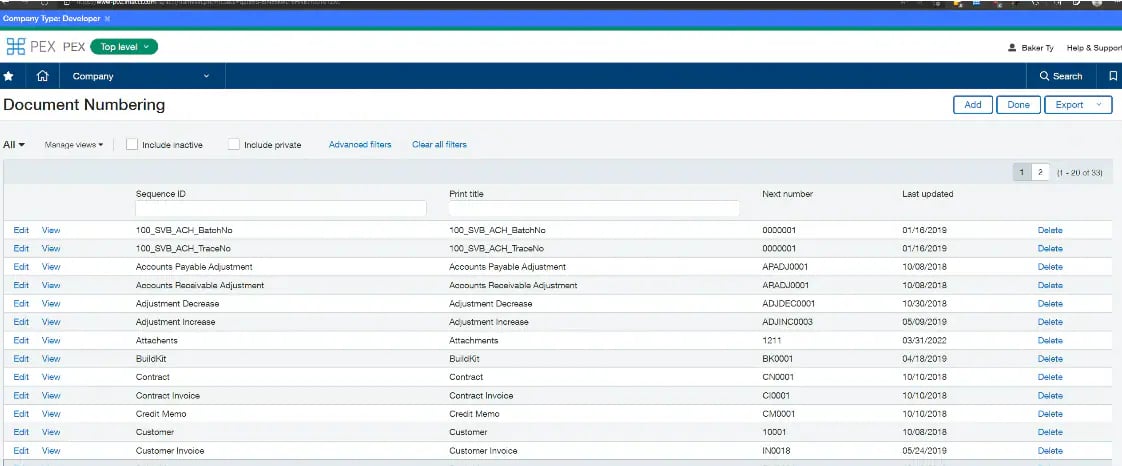
Here is a sample of what the document numbering looks like if this is successful:
Click **Save**.
Here is a sample of what the document numbering looks like if this is successful:
 ## Step 2: Add PEX's Sender ID
Navigate to **Applications** > **Company** > **Setup tab** > **Company** > **Security tab.**
Click **Edit**.
Go to the section labeled "Web Services authorizations".
**Note:**
You must have Web Services enabled on your account.
Click **Add**.
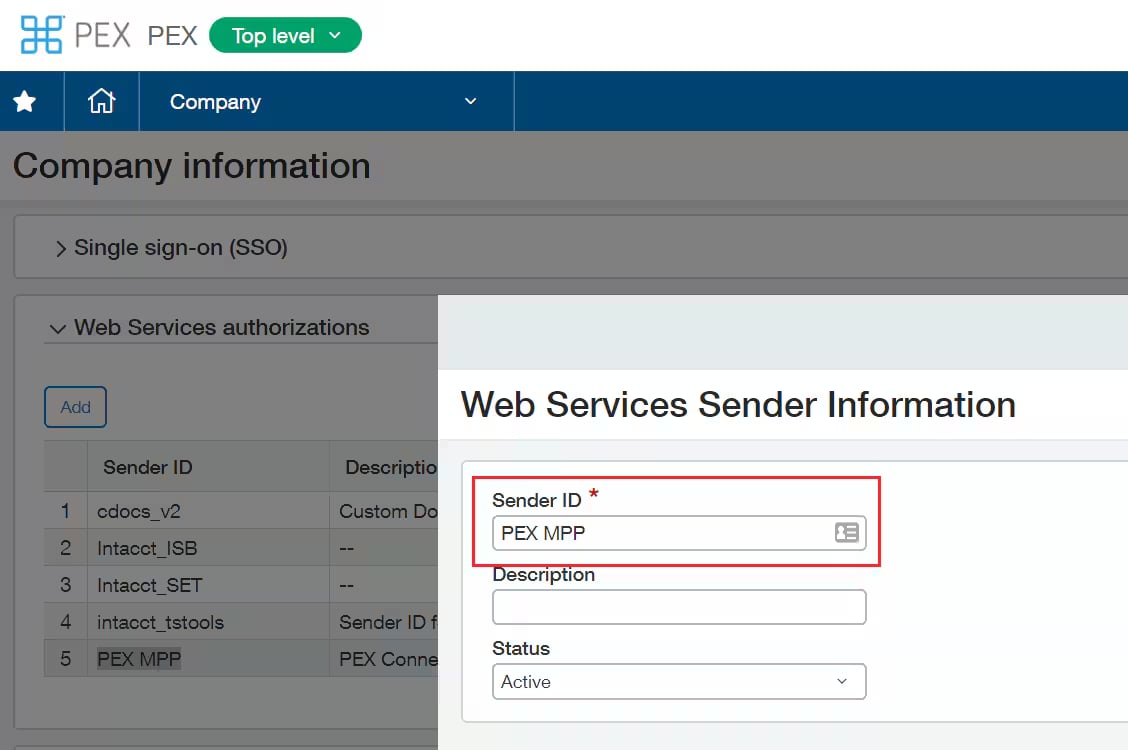
Sender ID = **PEX MPP**
**Note:**
It is very important to create sender ID exactly as **PEX MPP**
Click **Save**.
## Step 2: Add PEX's Sender ID
Navigate to **Applications** > **Company** > **Setup tab** > **Company** > **Security tab.**
Click **Edit**.
Go to the section labeled "Web Services authorizations".
**Note:**
You must have Web Services enabled on your account.
Click **Add**.
Sender ID = **PEX MPP**
**Note:**
It is very important to create sender ID exactly as **PEX MPP**
Click **Save**.
 ## Step 3: Create a Web Service PEX Sync User in Sage Intacct
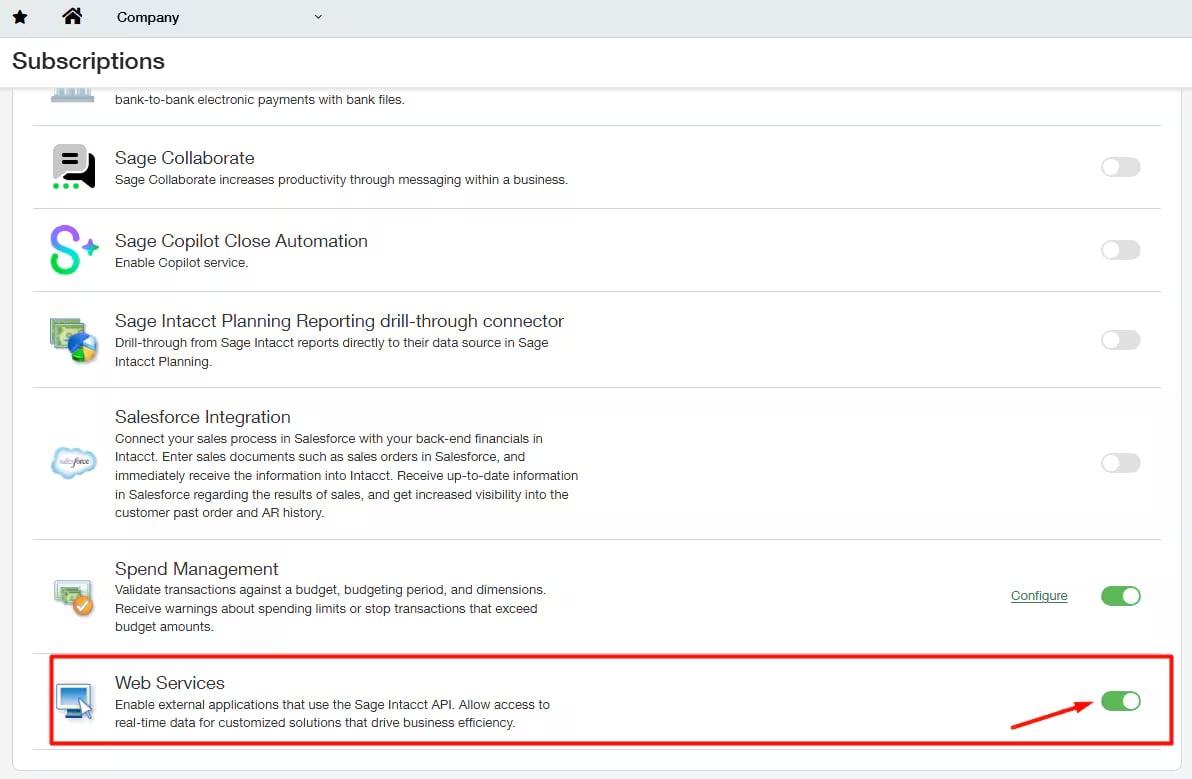
You must have Web Services enabled in Intacct (*Company > Admin tab > Subscriptions*).
## Step 3: Create a Web Service PEX Sync User in Sage Intacct
You must have Web Services enabled in Intacct (*Company > Admin tab > Subscriptions*).
 Create a user at the Root Level (top level) and give it full permissions.
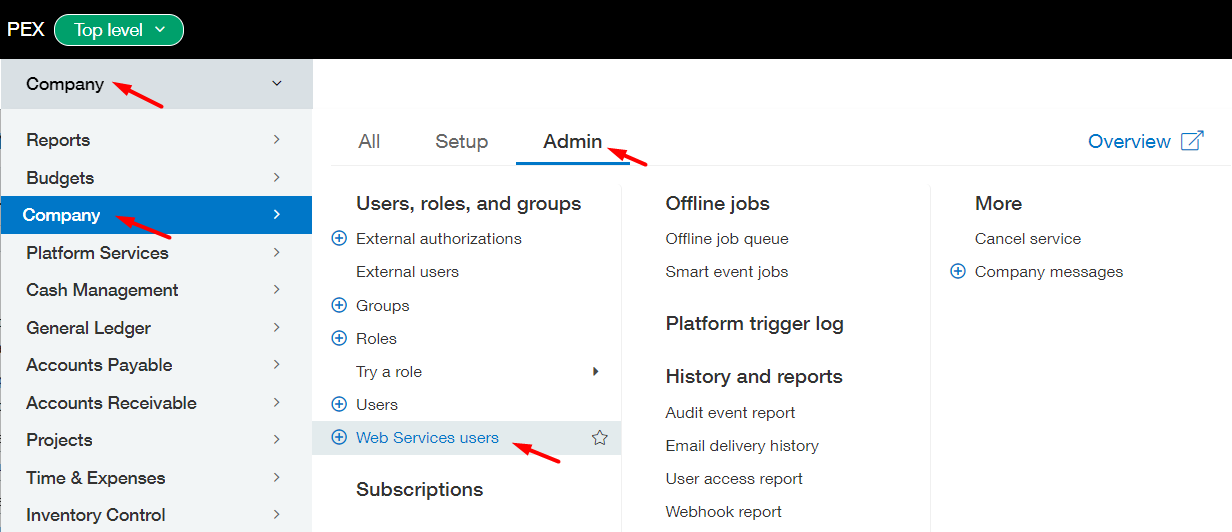
Navigate to **Company** > **Company** > **Admin tab** > **Web Services users.**
Create a user at the Root Level (top level) and give it full permissions.
Navigate to **Company** > **Company** > **Admin tab** > **Web Services users.**
 Click **Add.**
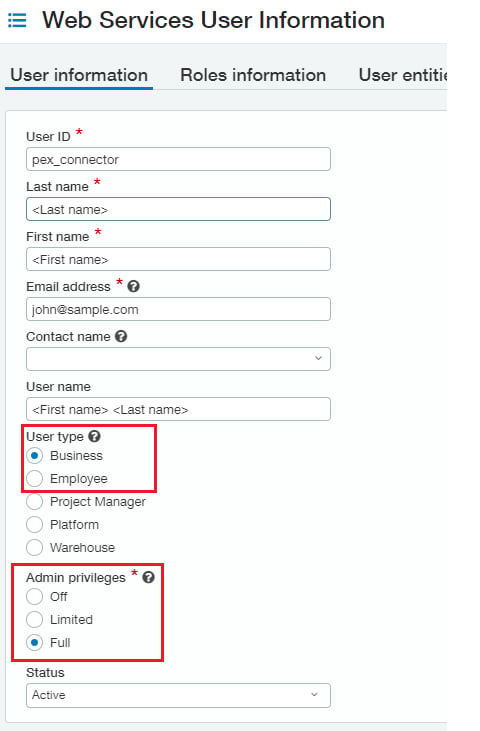
Set User ID = pex\_connector.
**Note:**
This username indicates a non-billable user and is used ONLY for the integration.
Email address: Use the email address of the person managing the PEX account or the sync.
User Type: select **Business.**
Admin Privileges: select **Full.**
Click **Add.**
Set User ID = pex\_connector.
**Note:**
This username indicates a non-billable user and is used ONLY for the integration.
Email address: Use the email address of the person managing the PEX account or the sync.
User Type: select **Business.**
Admin Privileges: select **Full.**
 Add **Role**.
 Click **Save**.
Once the Web Services PEX user is created, you will receive an email from Sage Intacct containing a temporary password.
## Step 4: General Ledger Set Up
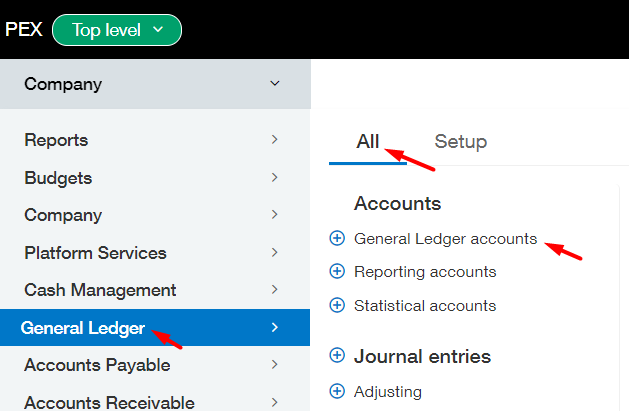
Navigate to **General Ledger > All tab > General Ledger accounts.**
Click **Save**.
Once the Web Services PEX user is created, you will receive an email from Sage Intacct containing a temporary password.
## Step 4: General Ledger Set Up
Navigate to **General Ledger > All tab > General Ledger accounts.**
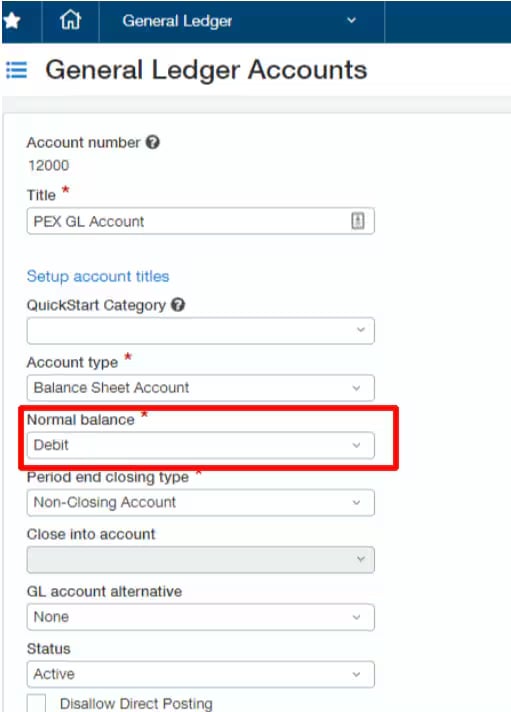
 Locate your PEX General Ledger Account (e.g., PEX GL Account).
Click **Edit**.
Ensure Normal Balance = Debit.
Locate your PEX General Ledger Account (e.g., PEX GL Account).
Click **Edit**.
Ensure Normal Balance = Debit.
 Click **Save**.
## User Defined Dimensions
If you want to sync transactions with user defined dimensions, grant the group access to read user defined dimensions go to **Company** > **Admin** > **Roles** > Click "**Edit**" on the Web Services user > Click "**View Subscriptions**" > Check a checkbox for "**User Defined Dimensions**" > Click on "**Permissions**" for the User Defined Dimensions > Give it read only permissions > Click "**Save**" a few times.
Click **Save**.
## User Defined Dimensions
If you want to sync transactions with user defined dimensions, grant the group access to read user defined dimensions go to **Company** > **Admin** > **Roles** > Click "**Edit**" on the Web Services user > Click "**View Subscriptions**" > Check a checkbox for "**User Defined Dimensions**" > Click on "**Permissions**" for the User Defined Dimensions > Give it read only permissions > Click "**Save**" a few times.