> ## Documentation Index
> Fetch the complete documentation index at: https://support.pexcard.com/llms.txt
> Use this file to discover all available pages before exploring further.
# Exporter for Daxko Accounting
> Convert PEX transactions into a Daxko Accounting compatible format for faster expense reporting within your accounting system. This application is for non-profits, YMCA's, Boys & Girls clubs, JCC's and more who use Daxko Accounting.
## Access App
To access the app:
Log in to [http://dashboard.pexcard.com/](http://dashboard.pexcard.com/?utm_source=support)
Navigate to [Apps > Available](https://dashboard.pexcard.com/apps/available?utm_source=support)
Locate **Exporter for Daxko Accounting**.
Click **More info** > **Install** > **Launch**.
**Note:**
To install the exporter, you need to enable the following permissions: *Edit business settings & apps*, *Manage cardholder*, *View card transactions*. You can enable them in [My Profile -> Permissions](https://dashboard.pexcard.com/account/permissions?utm_source=support).
## Configure App
Once the app has launched, you will be directed to set-up the app.
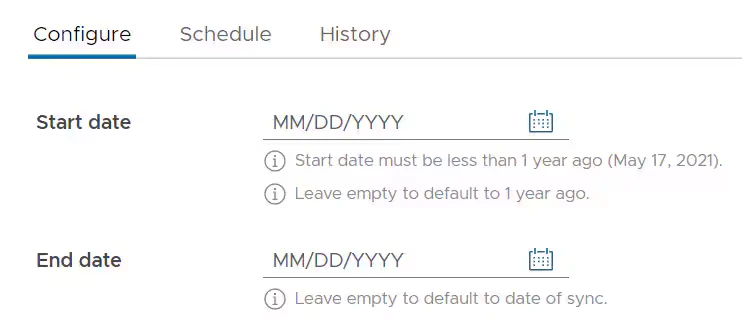
Select the earliest transaction date using the date picker (up to 1 year ago)
Enter an end date or leave it blank
 You will be presented the option to sync Purchases, Transfers, and/or Fees
Select the toggle to activate Purchases, which will update the toggle from grey to green
You will be presented the option to sync Purchases, Transfers, and/or Fees
Select the toggle to activate Purchases, which will update the toggle from grey to green
 Select if you would like to Export *All* transactions or only *Approved* transactions from the dropdown.
**Note:**
It's recommended to select *Approved* transactions.
Select if you would like to Export *All* transactions or only *Approved* transactions from the dropdown.
**Note:**
It's recommended to select *Approved* transactions.
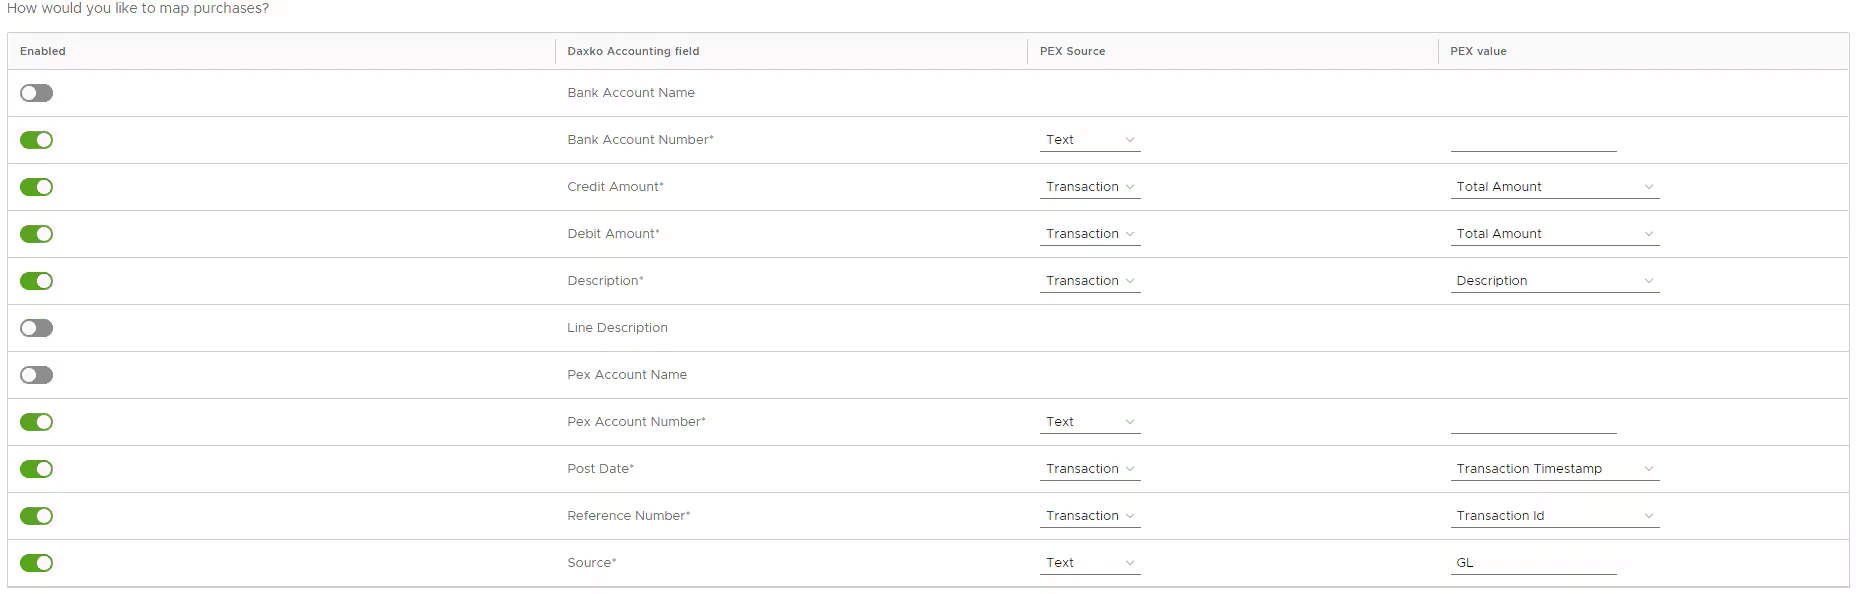
 Begin mapping PURCHASES for each of the fields. All required fields denoted with \* will be enabled by default. The **Target field** maps to Daxko Accounting. The **Source** options include Text, Tag, and Transaction. The **Source value** will change based on the **Source** option selected. All options included as a default can be updated based on your preferences.
**Note:**
*PEX Account No.* is your PEX account and *Bank Account* is the account that your business uses to fund your PEX account.
Begin mapping PURCHASES for each of the fields. All required fields denoted with \* will be enabled by default. The **Target field** maps to Daxko Accounting. The **Source** options include Text, Tag, and Transaction. The **Source value** will change based on the **Source** option selected. All options included as a default can be updated based on your preferences.
**Note:**
*PEX Account No.* is your PEX account and *Bank Account* is the account that your business uses to fund your PEX account.
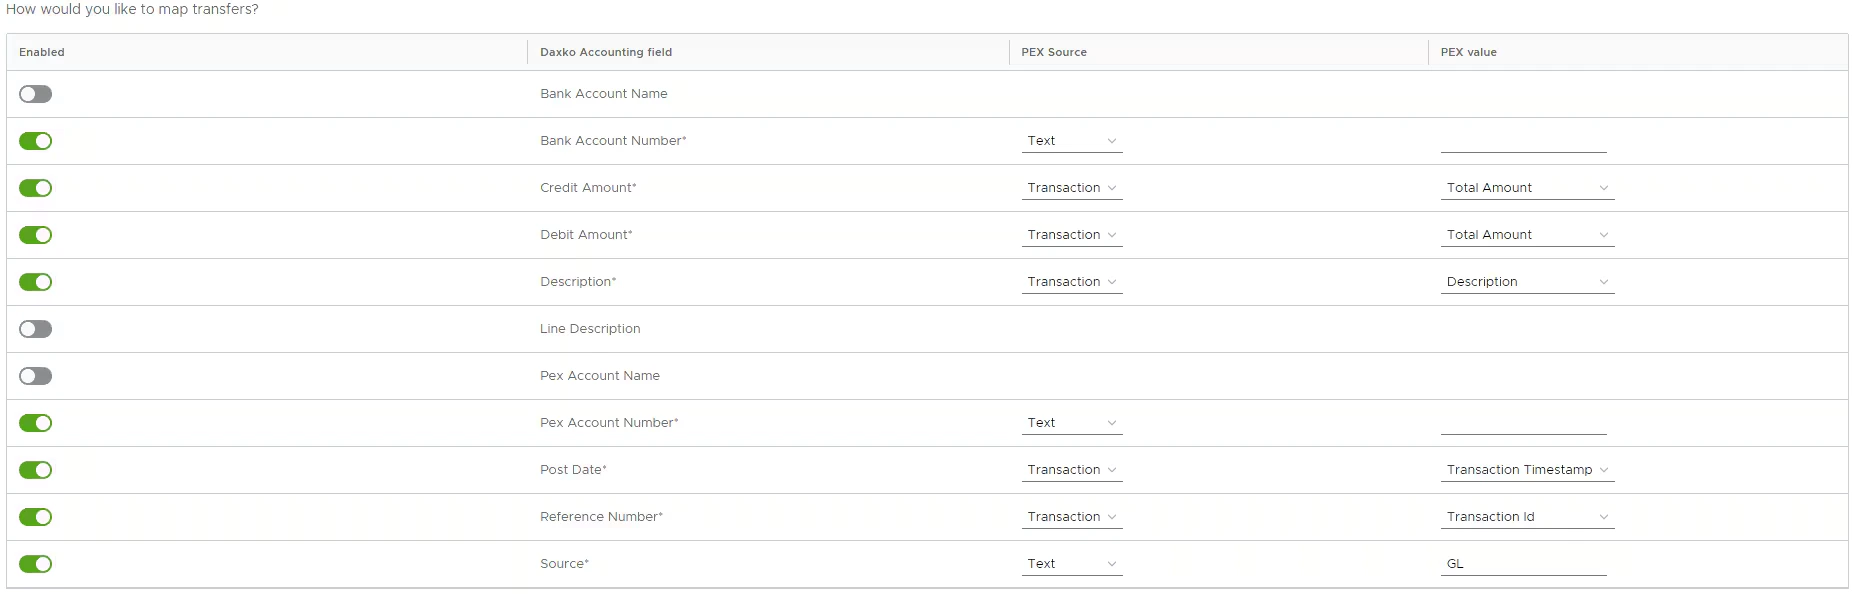
 If you would like to map TRANSFERS, follow the step for each of the fields. All required fields denoted with \* will be enabled by default. The **Target field** maps to Daxko Accounting. The **Source** options include Text, Tag, and Transaction. The **Source value** will change based on the **Source** option selected. All options included as a default can be updated based on your preferences.
**Note:**
*PEX Account No.* is your PEX account and *Bank Account* is the account that your business uses to fund your PEX account.
If you would like to map TRANSFERS, follow the step for each of the fields. All required fields denoted with \* will be enabled by default. The **Target field** maps to Daxko Accounting. The **Source** options include Text, Tag, and Transaction. The **Source value** will change based on the **Source** option selected. All options included as a default can be updated based on your preferences.
**Note:**
*PEX Account No.* is your PEX account and *Bank Account* is the account that your business uses to fund your PEX account.
 If you would like to map FEES, follow the step for each of the fields. All required fields denoted with \* will be enabled by default. The **Target field** maps to Daxko Accounting. The **Source** options include Text, Tag, and Transaction. The **Source value** will change based on the **Source** option selected. All options included as a default can be updated based on your preferences.
**Note:**
*Account No.* is the bank account where you pay FEES for the PEX platform.
If you would like to map FEES, follow the step for each of the fields. All required fields denoted with \* will be enabled by default. The **Target field** maps to Daxko Accounting. The **Source** options include Text, Tag, and Transaction. The **Source value** will change based on the **Source** option selected. All options included as a default can be updated based on your preferences.
**Note:**
*Account No.* is the bank account where you pay FEES for the PEX platform.
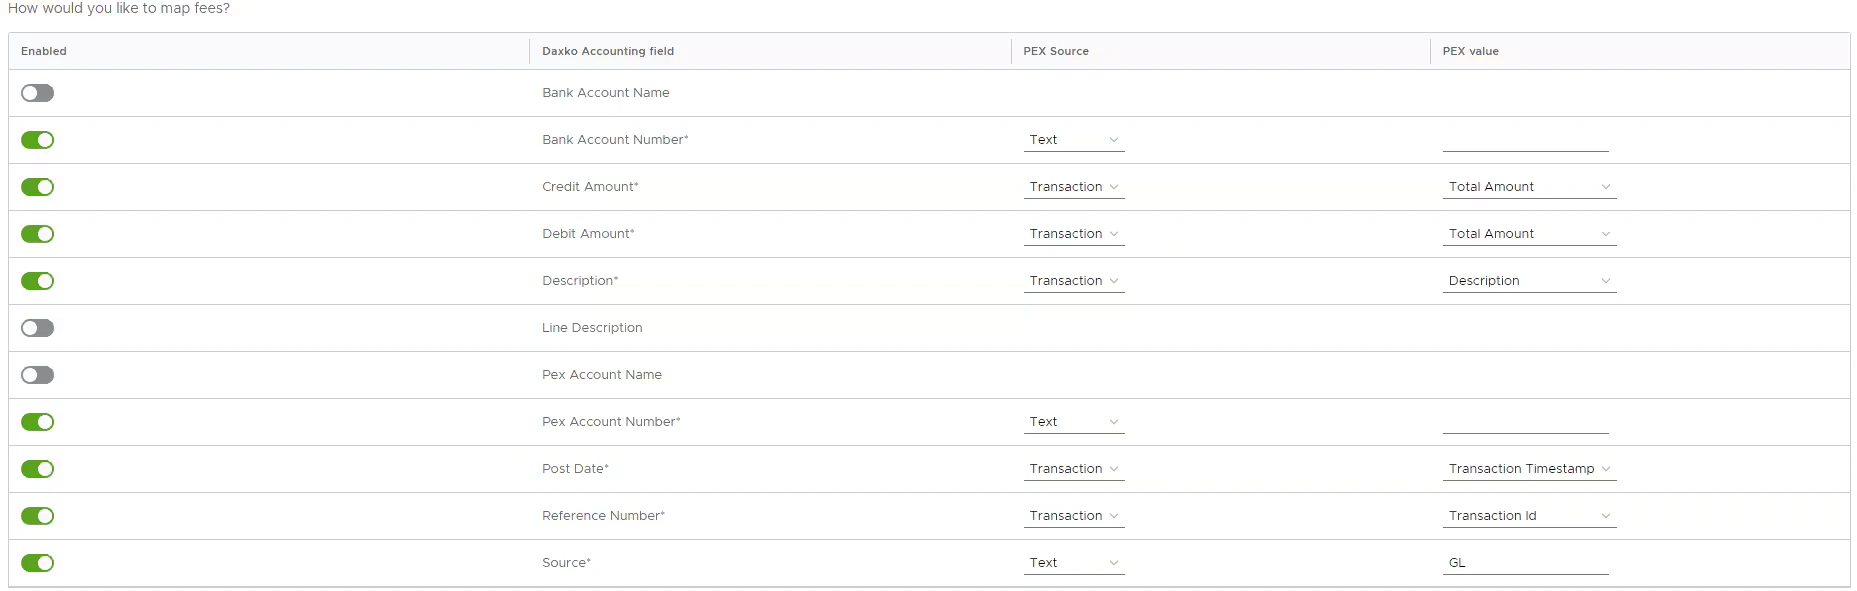 Once all required fields are populated, press 'Submit'.
 ## Schedule
*One time sync:* To run a one time report, select a date and time to run the report and press 'Save'.
## Schedule
*One time sync:* To run a one time report, select a date and time to run the report and press 'Save'.
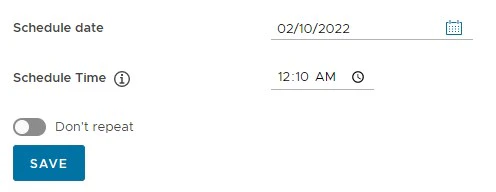 *Recurring sync:* To run this report on a recurring basis, select the frequency and end date for the scheduled report.
 ## History
The History tab shows you a list of prior exports including the date range selected, status, # transactions found, # transactions eligible, and # transactions exported. The Action tab will have a download button once the transactions can be downloaded (see below). If you selected a small date range with a low number of transactions, the download should be ready in less than a minute. If the date range contains a large number of transactions, it may take a few minutes to populate. Simply refresh the screen to get the latest update.
**Note:**
If you selected *Approved* transactions only on the Configure screen, only approved transactions will be visible.
## History
The History tab shows you a list of prior exports including the date range selected, status, # transactions found, # transactions eligible, and # transactions exported. The Action tab will have a download button once the transactions can be downloaded (see below). If you selected a small date range with a low number of transactions, the download should be ready in less than a minute. If the date range contains a large number of transactions, it may take a few minutes to populate. Simply refresh the screen to get the latest update.
**Note:**
If you selected *Approved* transactions only on the Configure screen, only approved transactions will be visible.
 ## FAQ
The Exporter for Daxko Accounting supports .XLS and .XLSS
At this time, split tags are not supported.
It is recommended to upload in increments of 2,000 transactions or less. To adjust, select a smaller date range.
Every exported purchase has a "Synced to PEX Connector for Daxko" note. If you remove this note, the purchase will be re-exported.
For any questions, please email [product@pexcard.com](mailto:product@pexcard.com)
## FAQ
The Exporter for Daxko Accounting supports .XLS and .XLSS
At this time, split tags are not supported.
It is recommended to upload in increments of 2,000 transactions or less. To adjust, select a smaller date range.
Every exported purchase has a "Synced to PEX Connector for Daxko" note. If you remove this note, the purchase will be re-exported.
For any questions, please email [product@pexcard.com](mailto:product@pexcard.com)