> ## Documentation Index
> Fetch the complete documentation index at: https://support.pexcard.com/llms.txt
> Use this file to discover all available pages before exploring further.
# PEX Auto Tagger
> Create dynamic rules that auto tag transactions with PEX tags. Creating rules reduces reconciliation time and enhances reporting.
***Watch a step-by-step demonstration [here](https://pex.navattic.com/3mo0z2j)!***
**Note:**
To use this app, tags must be enabled and set up on your PEX account. If your account does not include tags, please contact [adminsupport@pexcard.com](mailto:adminsupport@pexcard.com).
## Install
To use the app:
* Log in to [http://dashboard.pexcard.com/](http://dashboard.pexcard.com/?utm_source=support)
* Navigate to [Apps > Available](https://dashboard.pexcard.com/apps/available?utm_source=support)
* Locate **Auto Tagger**.
* Click **More info** > **Install** > **Launch**.
**Note:**
To install the app, you need to enable the following permissions: *Edit business settings & apps*, *View card transactions*. You can enable them in [My Profile -> Permissions](https://dashboard.pexcard.com/account/permissions?utm_source=support).
## Create Rules
To start, click **Create Rule** on the top right.
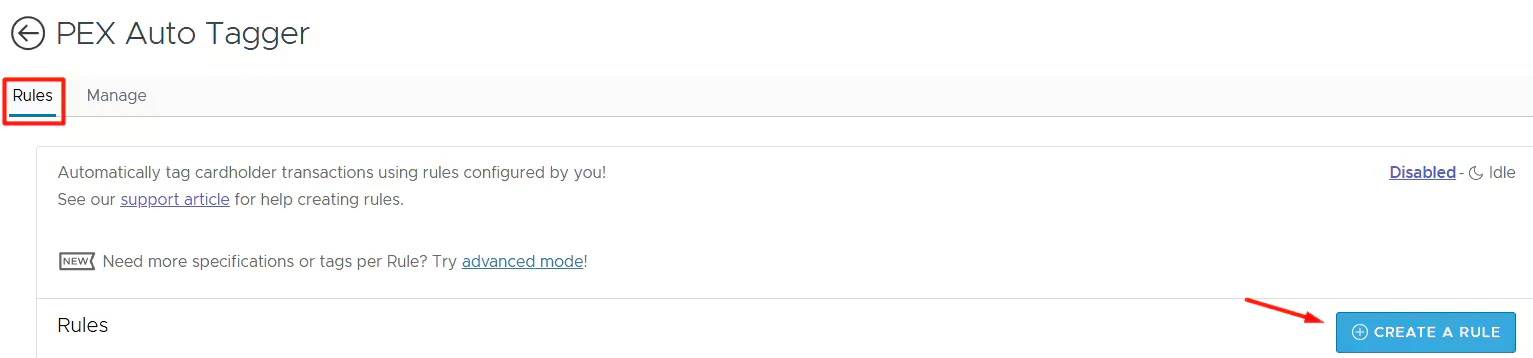 Set a **name** for the rule (e.g., Fuel, see sample below).
Select the **category** from the dropdown including Cardholder First Name, Cardholder Last Name, Cardholder Group, Merchant Category, Merchant MCC Code, Merchant Name, Transaction Any Note, Transaction Approval Status, Transaction Description, or Transaction Type.
* Merchant categories usually include more than one merchant category code. You can add custom merchant categories under [Business Settings -> Merchant categories](https://dashboard.pexcard.com/business-settings/merchant-categories?utm_source=support).
Specify the condition (e.g., Contains, Does Not Contain) and the value for the rule. The contents will populate based on the information in your profile. *Note: If "Ignore Capitalization" is selected, this criteria will be omitted from the rule selection.*
Indicate the **PEX tag** and associated value that you would like to use for this rule. Note: Only active PEX tags will be populated. Tags are managed within Business settings > Tag manager.
Select **Create**.
Set a **name** for the rule (e.g., Fuel, see sample below).
Select the **category** from the dropdown including Cardholder First Name, Cardholder Last Name, Cardholder Group, Merchant Category, Merchant MCC Code, Merchant Name, Transaction Any Note, Transaction Approval Status, Transaction Description, or Transaction Type.
* Merchant categories usually include more than one merchant category code. You can add custom merchant categories under [Business Settings -> Merchant categories](https://dashboard.pexcard.com/business-settings/merchant-categories?utm_source=support).
Specify the condition (e.g., Contains, Does Not Contain) and the value for the rule. The contents will populate based on the information in your profile. *Note: If "Ignore Capitalization" is selected, this criteria will be omitted from the rule selection.*
Indicate the **PEX tag** and associated value that you would like to use for this rule. Note: Only active PEX tags will be populated. Tags are managed within Business settings > Tag manager.
Select **Create**.
 Once the rule has been created, you will be able to view the ***Priority*** or order to which the rules are applied, ***Name*** that you gave your rule, ***Description*** of what the rule does, ***Enabled*** shows the status of the rule (active/inactive), and ***Updated By*** shows the admin who last updated the rule.
 ## Add multiple conditions and tags
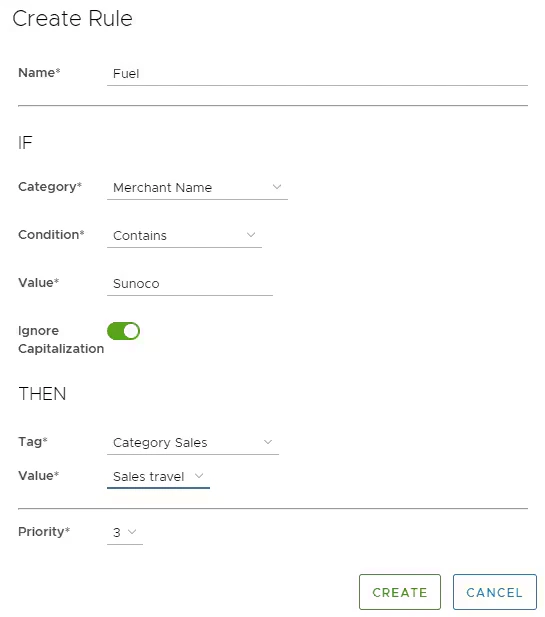
Select **Advanced Mode**\*.\*
## Add multiple conditions and tags
Select **Advanced Mode**\*.\*
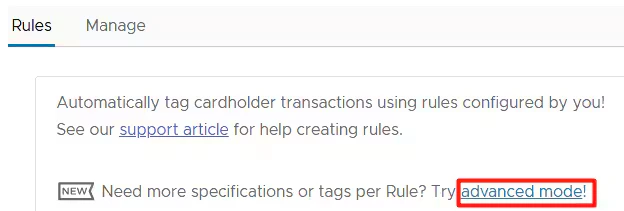 Select **Create Rule**\*.\*
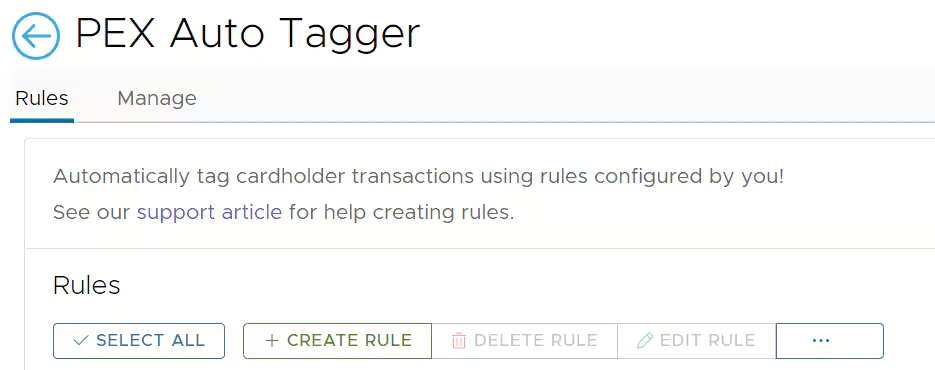 Add a name and description.
 You can autogenerate a description after you add at least one specification and one tag value. Until then the "Generate" button will be disabled.
Add specifications. To enter more than one specification, select **+ Add Specification**.
You can autogenerate a description after you add at least one specification and one tag value. Until then the "Generate" button will be disabled.
Add specifications. To enter more than one specification, select **+ Add Specification**.
 Note that the "**Condition**" field might have "**Regex Matches**" option for some properties. Example: Property - Merchant Name, Condition - Regex Matches, Value - (\[Ww]almart|\[Tt]arget). If you are interested in regular expressions, you can use [this tool](https://regexr.com/7kmgm).
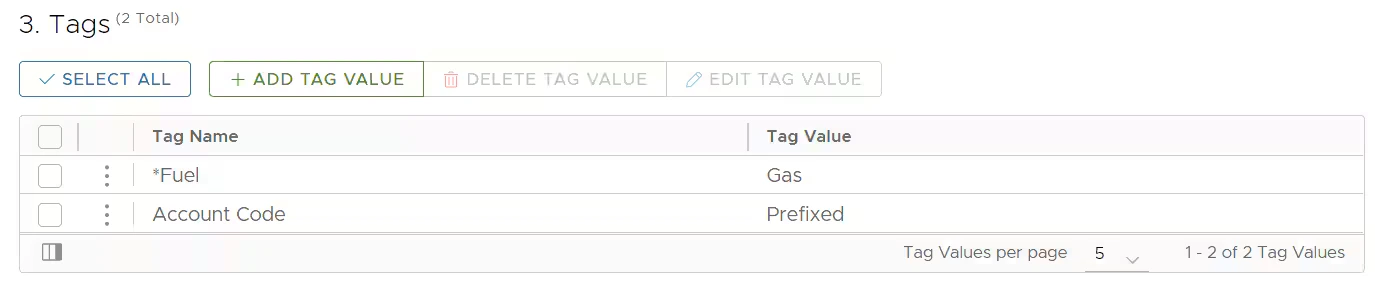
Add tags. To enter more than one tag, select ***+ A*****dd Tag Value**\*.\*
Note that the "**Condition**" field might have "**Regex Matches**" option for some properties. Example: Property - Merchant Name, Condition - Regex Matches, Value - (\[Ww]almart|\[Tt]arget). If you are interested in regular expressions, you can use [this tool](https://regexr.com/7kmgm).
Add tags. To enter more than one tag, select ***+ A*****dd Tag Value**\*.\*
 Select **Create**\*.\*
 ## Update rules
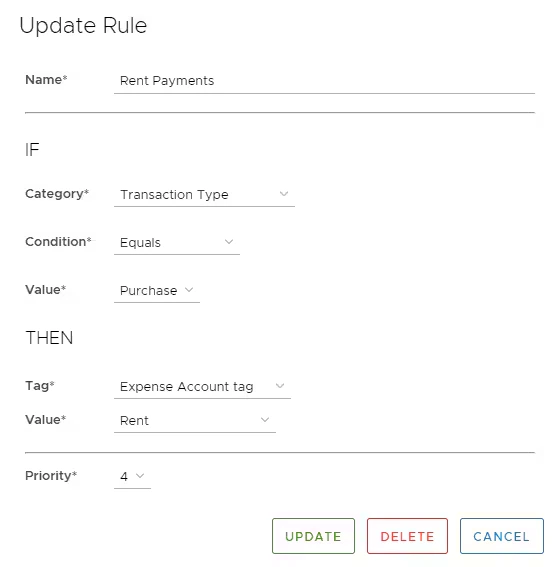
At any time Admins can edit rules previously created including change the priority of rules to be applied, delete rules, or edit the categories.
Click on the edit icon to the right of the rule.
From here you can update the rule name, category & tag values and the priority of the rule.
Click **Update**.
## Update rules
At any time Admins can edit rules previously created including change the priority of rules to be applied, delete rules, or edit the categories.
Click on the edit icon to the right of the rule.
From here you can update the rule name, category & tag values and the priority of the rule.
Click **Update**.
 ## Run Rules
Admins can:
* View the time of last sync.
* Disable all rules from processing:
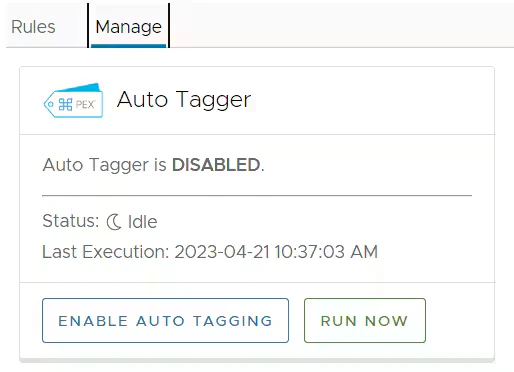
* Click on the Manage tab, you'll be able to view if the Auto Tagger is enabled or disabled and the last time of sync.
* If you would like to disable all active rules from processing, click "DISABLE AUTO TAGGING".
* Admin can also run ad-hoc auto tagging. You don't need to enable auto tagging to run ad-hoc auto tagging.
## Run Rules
Admins can:
* View the time of last sync.
* Disable all rules from processing:
* Click on the Manage tab, you'll be able to view if the Auto Tagger is enabled or disabled and the last time of sync.
* If you would like to disable all active rules from processing, click "DISABLE AUTO TAGGING".
* Admin can also run ad-hoc auto tagging. You don't need to enable auto tagging to run ad-hoc auto tagging.
 ## Auto Tagger Custom Options
You can set custom options when running ad-hoc auto tagging:
* Click **Run now**.
* Click **Custom options**.
* Select a start date. Transactions after this date will be processed.
* Start date must be less than 1 year ago.
* Leave empty to default to 2 weeks ago.
* Select an end date. Transactions after this date will not be processed.
* Leave empty to default to today.
* Decide if to process closed cardholders.
* By default, Auto Tagger skips closed cardholder accounts.
* Decide if to reprocess transactions.
* By default, Auto Tagger skips transactions it has already tagged.
* Click **Run**.
## FAQ
Auto Tagger runs your rules only against:
* Active cards' transactions.
* Settled transactions.
* Transactions in the "Not Reviewed" and "Rejected" statuses.
* If a transaction in the "Rejected" status is tagged, its status reverts to "Not Reviewed".
* Purchase transactions.
* Transactions up to 2 weeks in the past and on a go forward basis.
For first time rule set-up, Auto Tagger will be applied to transactions up to 2 weeks in the past. Once a rule is active, Auto Tagger will update transactions every 60 minutes. To view past tags, click on a transaction and look at the details.
Yes. Please visit the adding multiple conditions and tags above.
At this time, split tags are not supported.
Yes, but only manually. To perform this action, follow these steps:
Click on "Manage"
Select "Run Now"
Choose "Custom Options"
In the Custom Options section, specify the desired start date. Please note that the start date cannot be more than one year in the past.
Adjust any other options as necessary.
Finally, click on "Run" to initiate the process.
Auto Tagger tag transactions only once. Auto Tagger adds a transaction note when it tags a transaction. To reprocess and retag transactions, follow these steps:
Click on "Manage"
Select "Run Now"
Choose "Custom Options"
In the Custom Options section, specify the desired start date. Please note that the start date cannot be more than one year in the past.
Adjust any other options as necessary.
Finally, click on "Run" to initiate the process.
## Auto Tagger Custom Options
You can set custom options when running ad-hoc auto tagging:
* Click **Run now**.
* Click **Custom options**.
* Select a start date. Transactions after this date will be processed.
* Start date must be less than 1 year ago.
* Leave empty to default to 2 weeks ago.
* Select an end date. Transactions after this date will not be processed.
* Leave empty to default to today.
* Decide if to process closed cardholders.
* By default, Auto Tagger skips closed cardholder accounts.
* Decide if to reprocess transactions.
* By default, Auto Tagger skips transactions it has already tagged.
* Click **Run**.
## FAQ
Auto Tagger runs your rules only against:
* Active cards' transactions.
* Settled transactions.
* Transactions in the "Not Reviewed" and "Rejected" statuses.
* If a transaction in the "Rejected" status is tagged, its status reverts to "Not Reviewed".
* Purchase transactions.
* Transactions up to 2 weeks in the past and on a go forward basis.
For first time rule set-up, Auto Tagger will be applied to transactions up to 2 weeks in the past. Once a rule is active, Auto Tagger will update transactions every 60 minutes. To view past tags, click on a transaction and look at the details.
Yes. Please visit the adding multiple conditions and tags above.
At this time, split tags are not supported.
Yes, but only manually. To perform this action, follow these steps:
Click on "Manage"
Select "Run Now"
Choose "Custom Options"
In the Custom Options section, specify the desired start date. Please note that the start date cannot be more than one year in the past.
Adjust any other options as necessary.
Finally, click on "Run" to initiate the process.
Auto Tagger tag transactions only once. Auto Tagger adds a transaction note when it tags a transaction. To reprocess and retag transactions, follow these steps:
Click on "Manage"
Select "Run Now"
Choose "Custom Options"
In the Custom Options section, specify the desired start date. Please note that the start date cannot be more than one year in the past.
Adjust any other options as necessary.
Finally, click on "Run" to initiate the process.