> ## Documentation Index
> Fetch the complete documentation index at: https://support.pexcard.com/llms.txt
> Use this file to discover all available pages before exploring further.
# PEX Connector for Google Sheets
> The PEX Connector for **Google Sheets** allows Admins to sync settled PEX purchases to Google Sheets. Spreadsheets will be automatically created and grouped by month allowing you to reference all transactions on a go forward basis.
## Accessing App
To access the app:
Log in to [http://dashboard.pexcard.com/](http://dashboard.pexcard.com/?utm_source=support)
Click "**Apps**" from the left navigation.
Navigate to the "**Available**" tab.
Locate "**Google Sheets**".
Click "**More info**" on the tile.
Click "**Install**".
Click "**Launch**".
**Note:**
To install the connector, you need to enable the following permissions: *Edit business settings & apps*, *View card transactions*. You can enable them in [My Profile -> Permissions](https://dashboard.pexcard.com/account/permissions?utm_source=support).
## Initializing App
Follow the steps to connect your PEX account and your Google account:
Once the app has launched for the first time click "**Connect**".
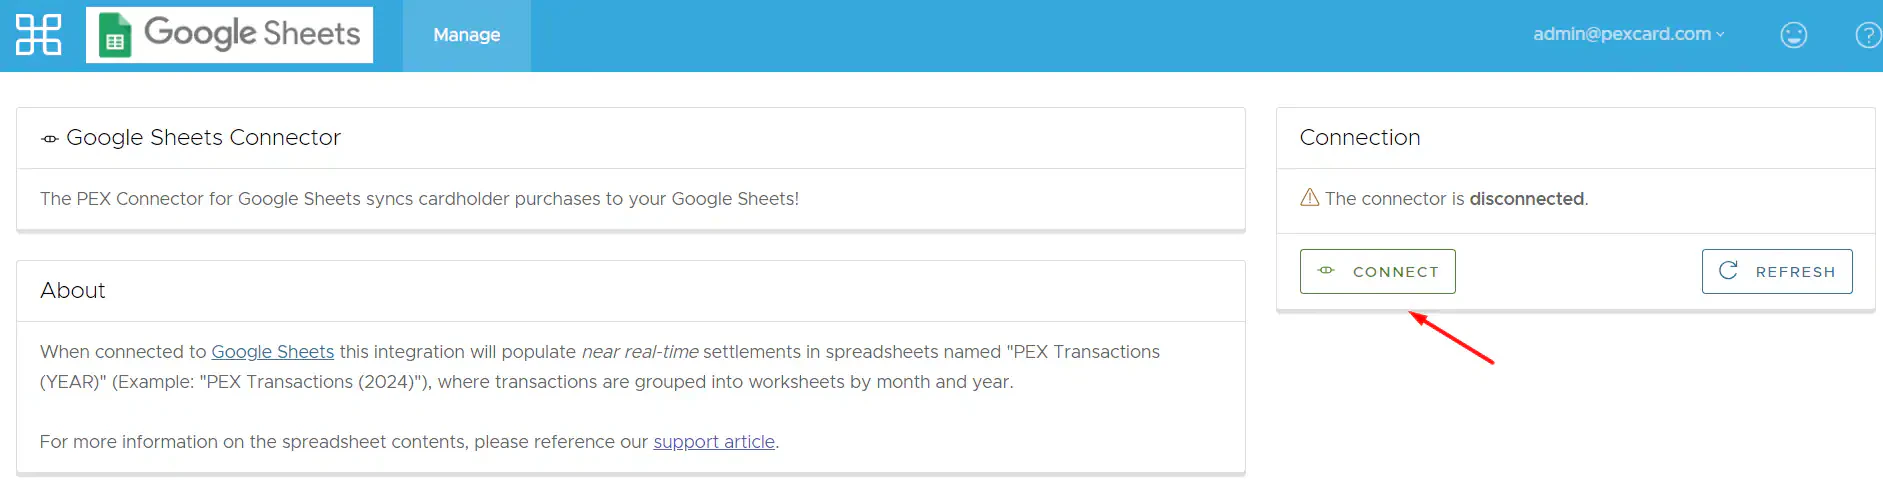 Click "**Connect**" below to authenticate your account with the application.
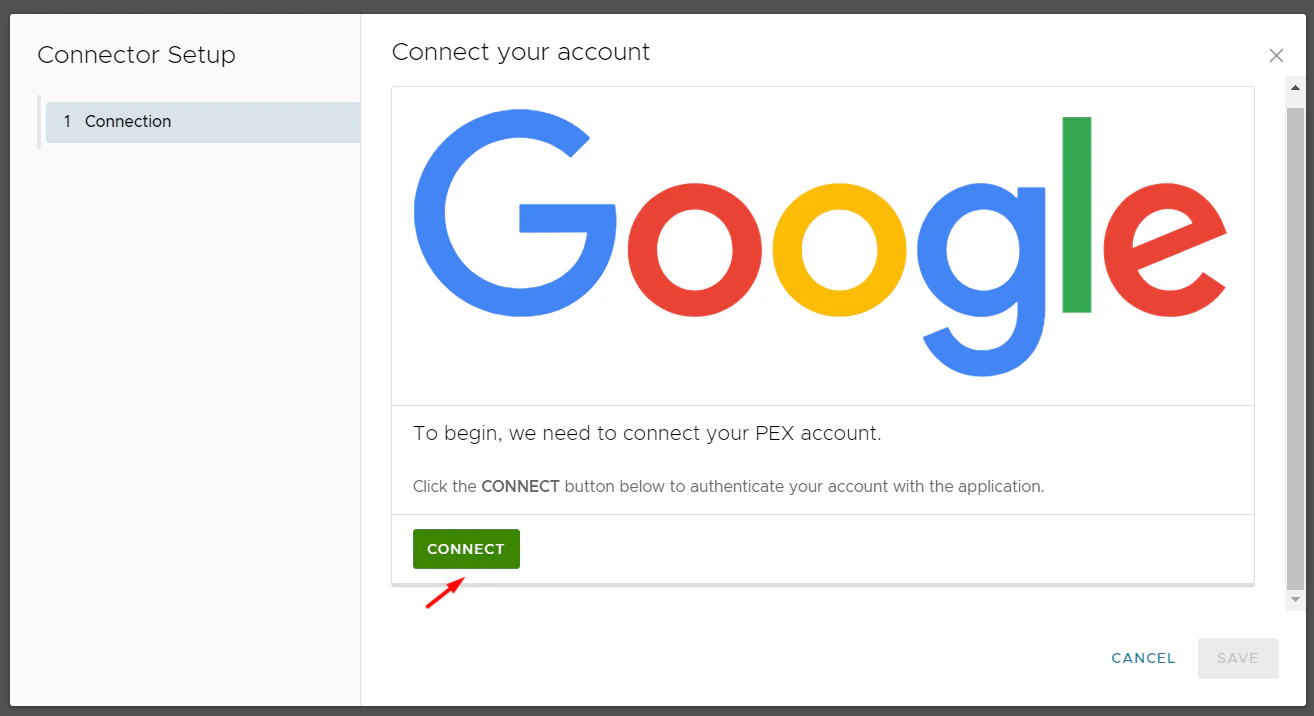 You are redirected to a Google sign in form.
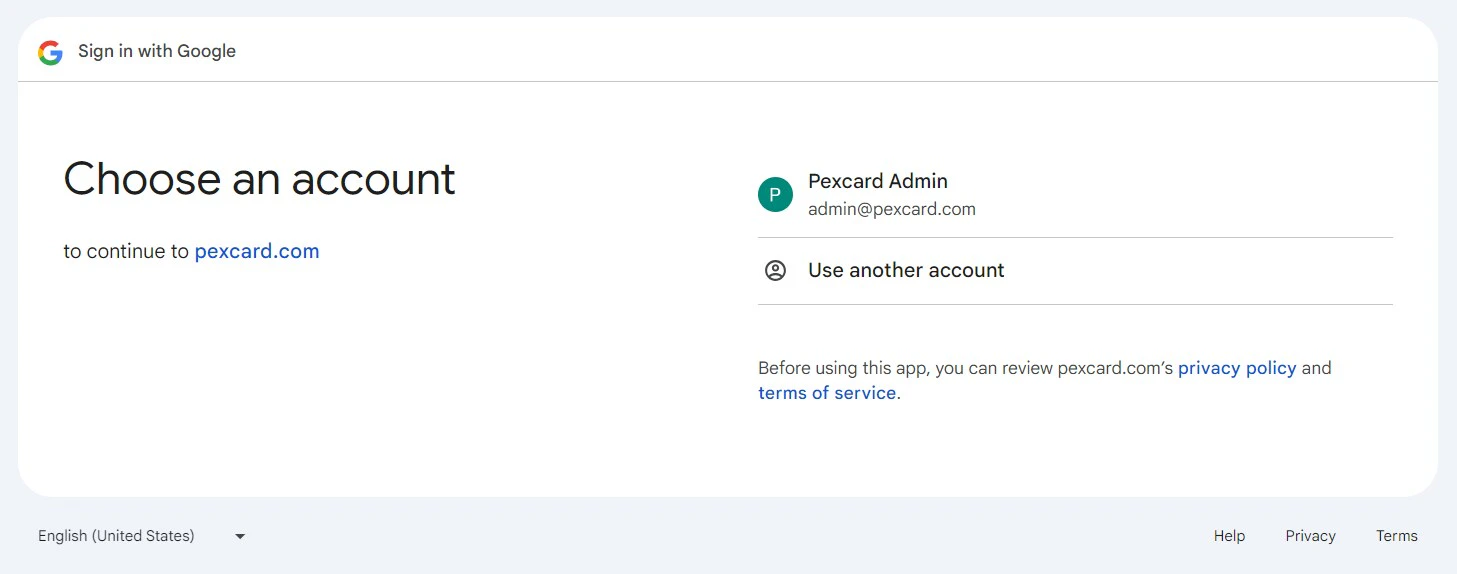 Select your Google account or enter its email/phone and password.
Click "**Continue**".
Select your Google account or enter its email/phone and password.
Click "**Continue**".
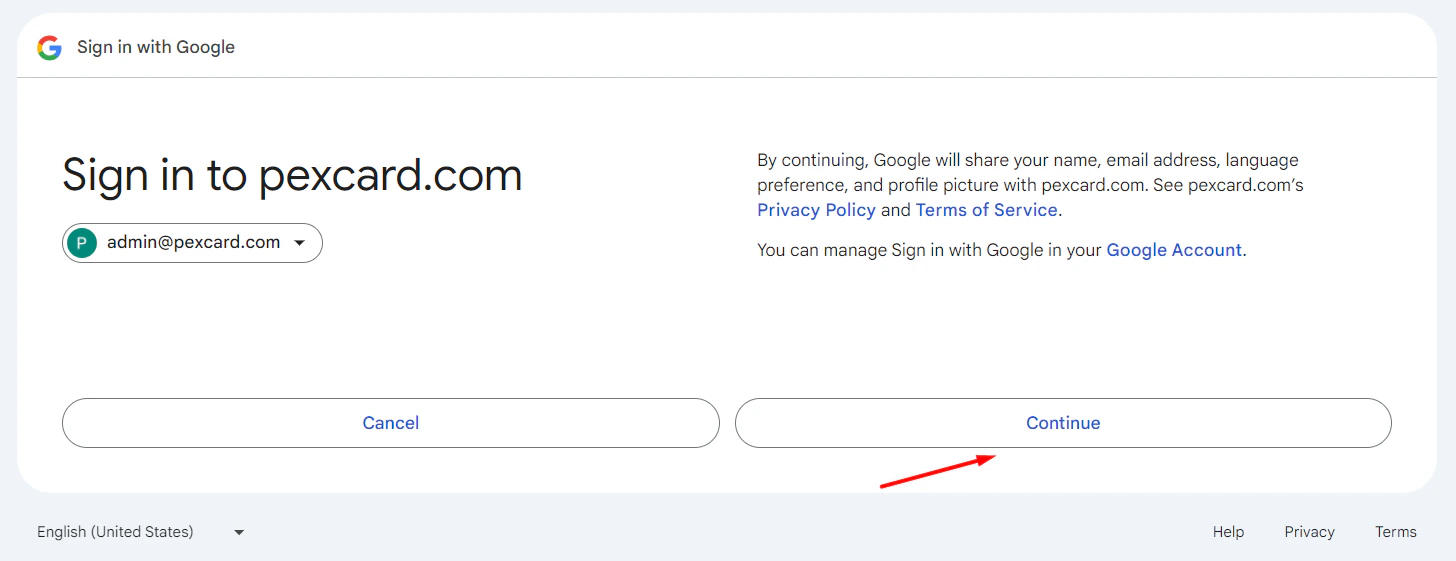 Check the following checkbox to grant PEX permission to access your Google Account.
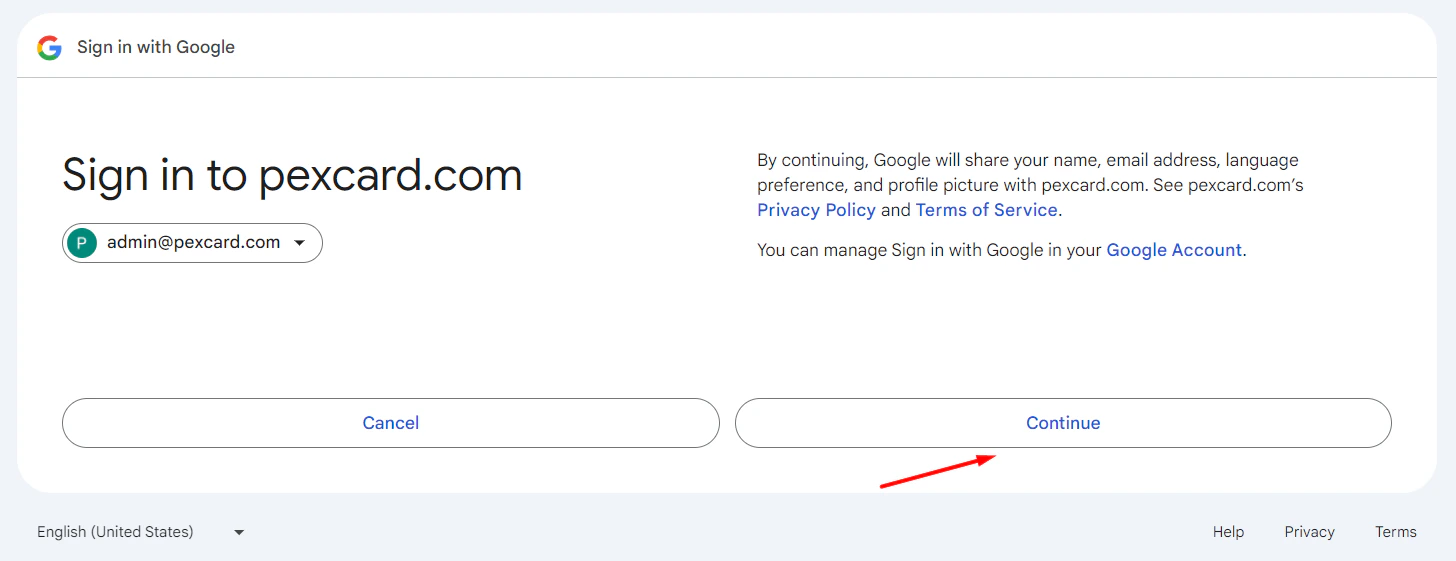 Click "**Continue**".
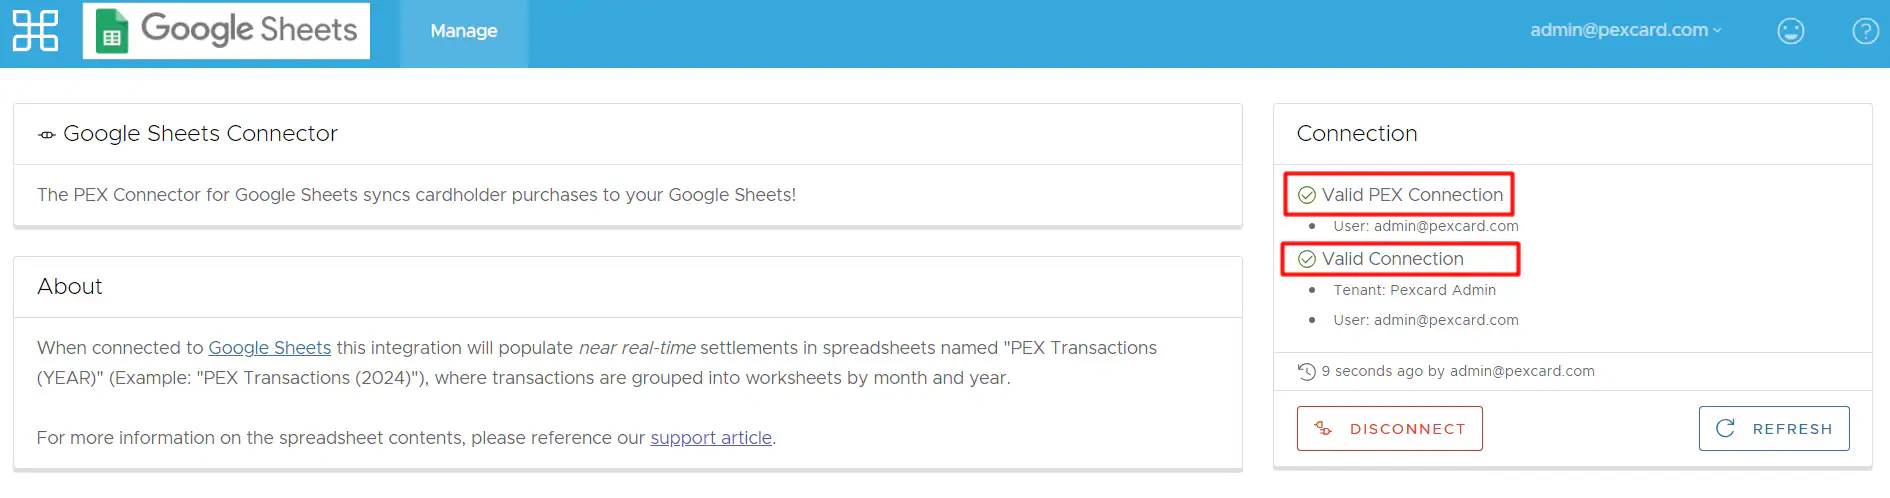
Once successfully connected, you are redirected to the "Manage" tab. You will see green checkmarks and the statuses "Valid PEX Connection" and "Valid Connection".
Click "**Continue**".
Once successfully connected, you are redirected to the "Manage" tab. You will see green checkmarks and the statuses "Valid PEX Connection" and "Valid Connection".
 ## Using App
Sign in your [Google Sheets](https://docs.google.com/spreadsheets) connected to a Google Account that you have selected to sync transactions to.
Locate the spreadsheet named "PEX Transactions (\)" by following this path: PEX\Transactions\PEX Transactions (\).
Double-click on it.
View your synced settled purchase transactions.
**Synced settled purchase transactions are broken down by:**
1. Month: Navigate between spreadsheet’s bottom tabs to view transactions for a particular month.
2. Year: A new spreadsheet named "PEX Transactions (\)" will be automatically created for every year.
**Every transaction record contains the following fields:**
1. Transaction ID
2. Merchant ID
3. MCC
4. Merchant Name
5. Transaction Time (EST)
6. Settlement Time (EST)
7. Cardholder ID
8. Cardholder Name
9. Description
10. Amount
11. Cardholder Group
When a new transaction is settled then its record will appear in your "PEX Transactions (\)" spreadsheet as a new row.
**Note:**
The PEX Connector syncs:
1. Only settled purchase transactions.
2. No past transactions.
## How PEX shares data with Google
Connecting PEX to your Google account is required to sync transaction data into your personal Google Sheets. The PEX Connector for Google Sheets will only read and write data to your "PEX Transactions (\)" spreadsheet. For more information on the PEX Privacy Policy, please navigate [here](https://www.pexcard.com/legal/privacy-policy/?utm_source=support).
## Support & Inquiries
For any questions related to your connector, please email [appsupport+googlesheets@pexcard.com](mailto:appsupport+googlesheets@pexcard.com)
## Using App
Sign in your [Google Sheets](https://docs.google.com/spreadsheets) connected to a Google Account that you have selected to sync transactions to.
Locate the spreadsheet named "PEX Transactions (\)" by following this path: PEX\Transactions\PEX Transactions (\).
Double-click on it.
View your synced settled purchase transactions.
**Synced settled purchase transactions are broken down by:**
1. Month: Navigate between spreadsheet’s bottom tabs to view transactions for a particular month.
2. Year: A new spreadsheet named "PEX Transactions (\)" will be automatically created for every year.
**Every transaction record contains the following fields:**
1. Transaction ID
2. Merchant ID
3. MCC
4. Merchant Name
5. Transaction Time (EST)
6. Settlement Time (EST)
7. Cardholder ID
8. Cardholder Name
9. Description
10. Amount
11. Cardholder Group
When a new transaction is settled then its record will appear in your "PEX Transactions (\)" spreadsheet as a new row.
**Note:**
The PEX Connector syncs:
1. Only settled purchase transactions.
2. No past transactions.
## How PEX shares data with Google
Connecting PEX to your Google account is required to sync transaction data into your personal Google Sheets. The PEX Connector for Google Sheets will only read and write data to your "PEX Transactions (\)" spreadsheet. For more information on the PEX Privacy Policy, please navigate [here](https://www.pexcard.com/legal/privacy-policy/?utm_source=support).
## Support & Inquiries
For any questions related to your connector, please email [appsupport+googlesheets@pexcard.com](mailto:appsupport+googlesheets@pexcard.com)