> ## Documentation Index
> Fetch the complete documentation index at: https://support.pexcard.com/llms.txt
> Use this file to discover all available pages before exploring further.
# How to Attach a Receipt to a Transaction Record (Website; Cardholder)
> Upload a receipt image to a transaction from the PEX dashboard website so your administrator has the documentation they need.
Cardholders can attach an image of a receipt to a transaction through the PEX website dashboard. This article covers uploading through the website, however, cardholders can also add receipts with the PEX [mobile app](/cardholder-guide/how-to-attach-a-receipt-to-a-transaction-record-mobile-app-cardholder) from a phone or mobile device.
## How to Attach a Receipt to a Transaction
Take a picture of the receipt or scan the receipt to your computer
Log in to [dashboard.pexcard.com](https://dashboard.pexcard.com?utm_source=support)
Navigate to the "Transactions" tab
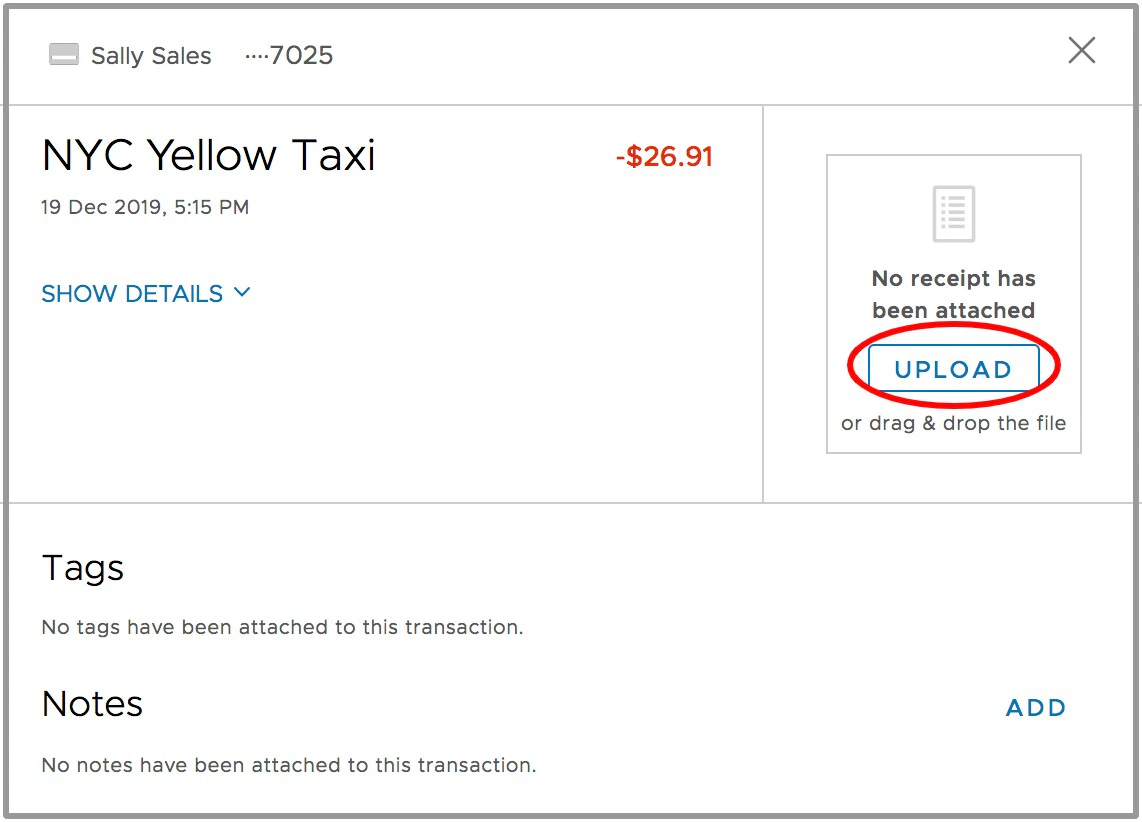
Locate the relevant transaction, and click on it to see the transaction details
* You can use the *Filter* button above the transaction list to add a filter which may help narrow the list of transactions to help find a specific transaction.
Click the "Upload" button in the transaction details window
Locate the image file of the receipt on your computer
* You can also drag-and-drop the file on to the window that says "Upload"
Upload and attach the image - one file per transaction.
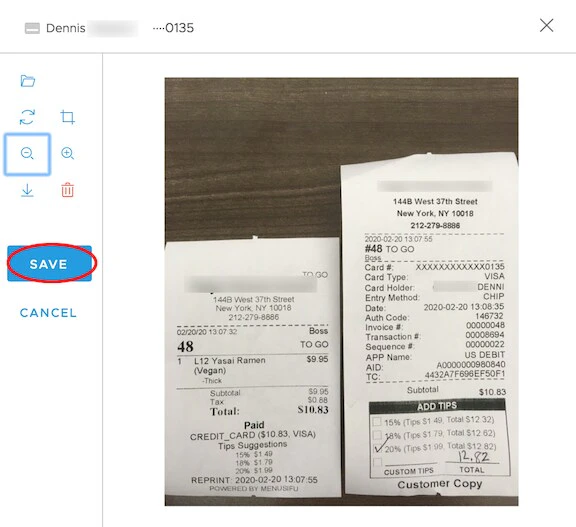
Click "Save" in the following window.
* The image upload window will have tools such as Rotate, Crop, Zoom In, Zoom Out to help you edit the image.
* You can also choose a different file, save an existing receipt image from this window to your current device, and/or Edit your uploaded image at a later date from this window.
When uploading an image of the receipt, the PEX system will verify that:
* The image format is one that is supported by the system:
* .PNG
* .JPG
* .PDF
* The file contains no malware or computer viruses
* The file is not corrupted
* The file is smaller than 1 MB