

- Download the iOS App from the App Store
- Download the Android App from the Google Play Store
- The download is free but carrier data rates may apply
https://support.apple.com/en-us/HT203033 More information about app permissions on Android is available here: https://support.google.com/googleplay/answer/6270602?hl=en
To Attach a Receipt to a Transaction Record:
1
Take a picture of the receipt
2
Locate the transaction
3
Attach the image and upload it to PEX - one file per transaction. Please see details below on how to upload the image.
1
That the image format is supported by the system:
- .PNG
- .JPG
2
That the file contains no malware or computer viruses
3
That the file is not corrupted
4
That the file is smaller than 10 MB
1
Log in to the PEX Mobile App
2
Click on the “Transactions” icon at the bottom of the screen
3
Navigate to the cardholder transaction list
4
Click on the correct merchant transaction for the receipt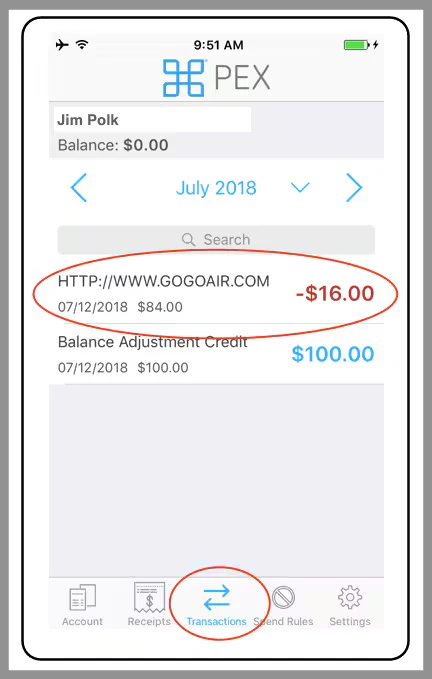
- Click the “Add Receipt” button
- It is a camera icon with plus sign (”+”) towards the center of the display.
- There are three ways to attach the receipt image to the transaction (you can crop or rotate the image before you finally upload it):
- Take a photo of the receipt with the camera
- Use an image of the receipt that has previously been saved in the receipt Gallery
- Use an image of the receipt that’s already in your image Gallery
- Upload the image of the receipt to PEX
- Take a photograph of the receipt with your phone’s camera and save it in the PEX Receipts folder.
- You cannot log in to the PEX app when you are offline
- The only transactions that will appear from the Receipt tab are transactions without receipts, and transactions with a receipt where the status is “Rejected”
- Log in to the PEX Mobile App when you are online again and access the Receipts tab. Once the internet connects whatever images you saved in the Receipts folder will appear.
- Click on the particular image you want to attach a receipt to.
- Find the transaction you want and attach it there.
- Alternatively, you can also go to the specific Transaction and access the receipt gallery there as well.
- Take a photograph of the receipt with your phone’s camera and save it in the PEX Receipts folder.
- Select the image of the receipt you want from the receipt gallery or your device’s local gallery
- Once a receipt has been added, the Receipt icon will be replaced with a preview of the attachment. If you wish to save this image to your device, replace or delete the attachment all you have to do is click on the image and follow the prompts.
- After you upload a Receipt, users will have the opportunity to then add a Note as well. If a user enters nothing and Saves, then no Note is created. Nonetheless, notes can be created anytime afterward.
- Please note, for users who have Tag functionality enabled, and if there are “Required Tags” you must enter the tag value before attaching the Receipt, otherwise you will see this error.