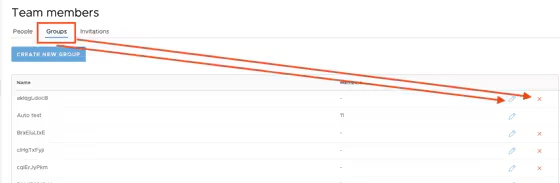
- Once you have set up Groups, you can assign new Cardholders to them when you create new cards.
- You can assign Cardholders to Groups at any time thereafter, via the Cards screen.
- To delete or enable editing of a group name, you will first have to remove that group from being assigned to any cardholder. To view cards a group is assigned to, click on the group names.
Watch a step-by-step demonstration here!
How to assign multiple cardholders to an existing group
1
Log in to dashboard.pexcard.com
2
Click the “Cards” tab
3
Filter your list to locate multiple cardholders you wish to select. Check the checkboxes next to their names.
4
Click “Group” in the column above the checked list, and select from the dropdown menu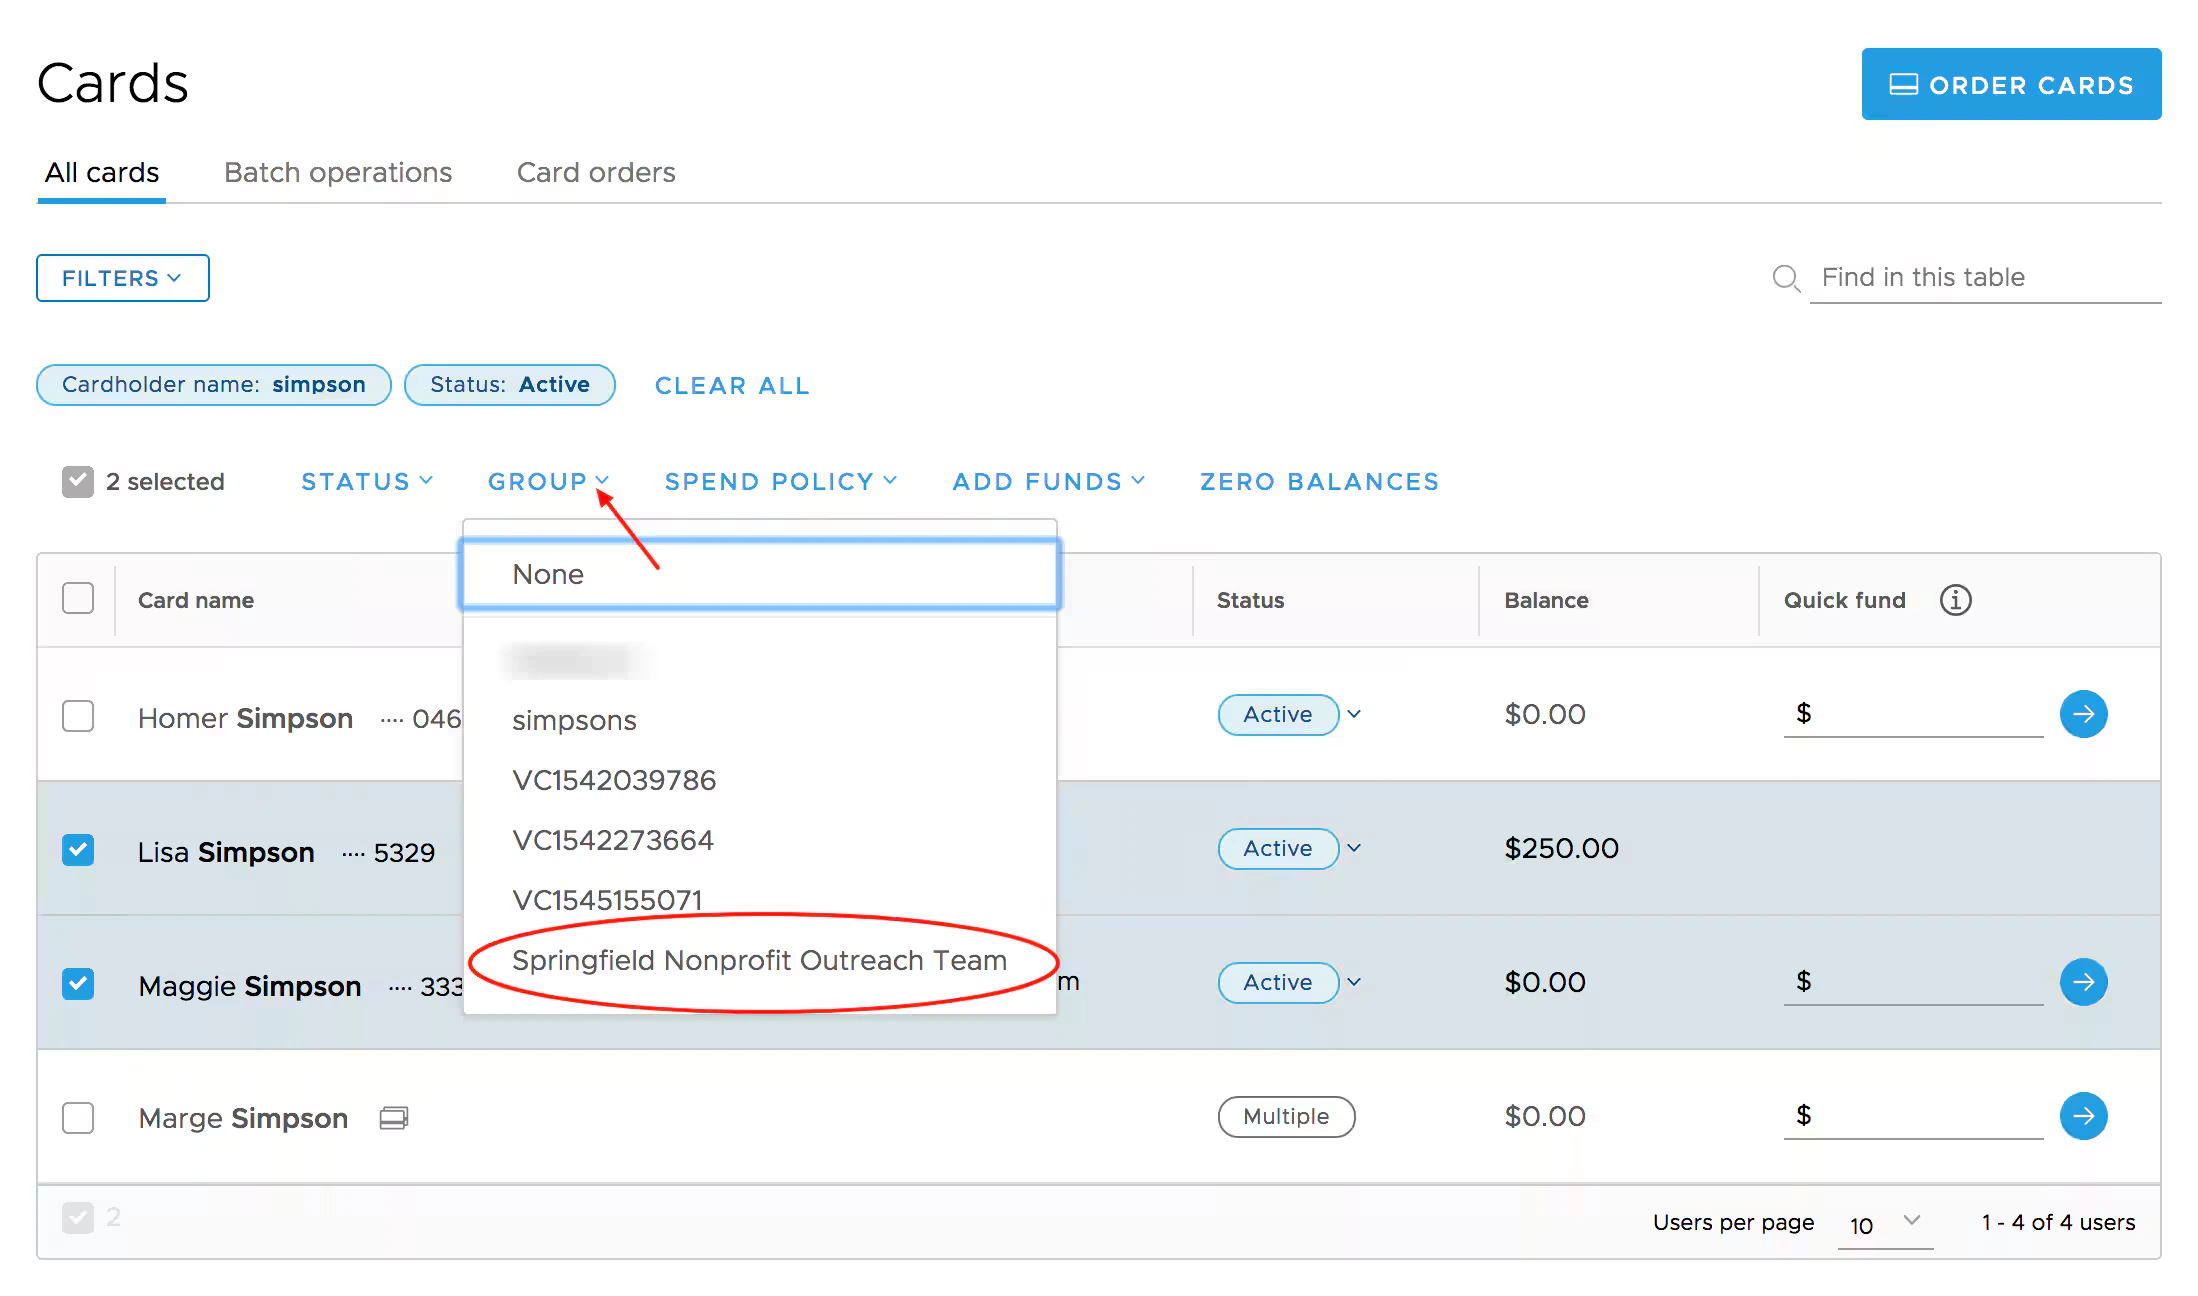
5
Click “Assign Group” in the confirmation screen
How to assign an individual cardholder to existing groups, or to new groups
1
Log in to dashboard.pexcard.com
2
Click the “Cards” tab
3
Locate the cardholder in the list, and click on their name
4
Click the “Owner” tab on the card details page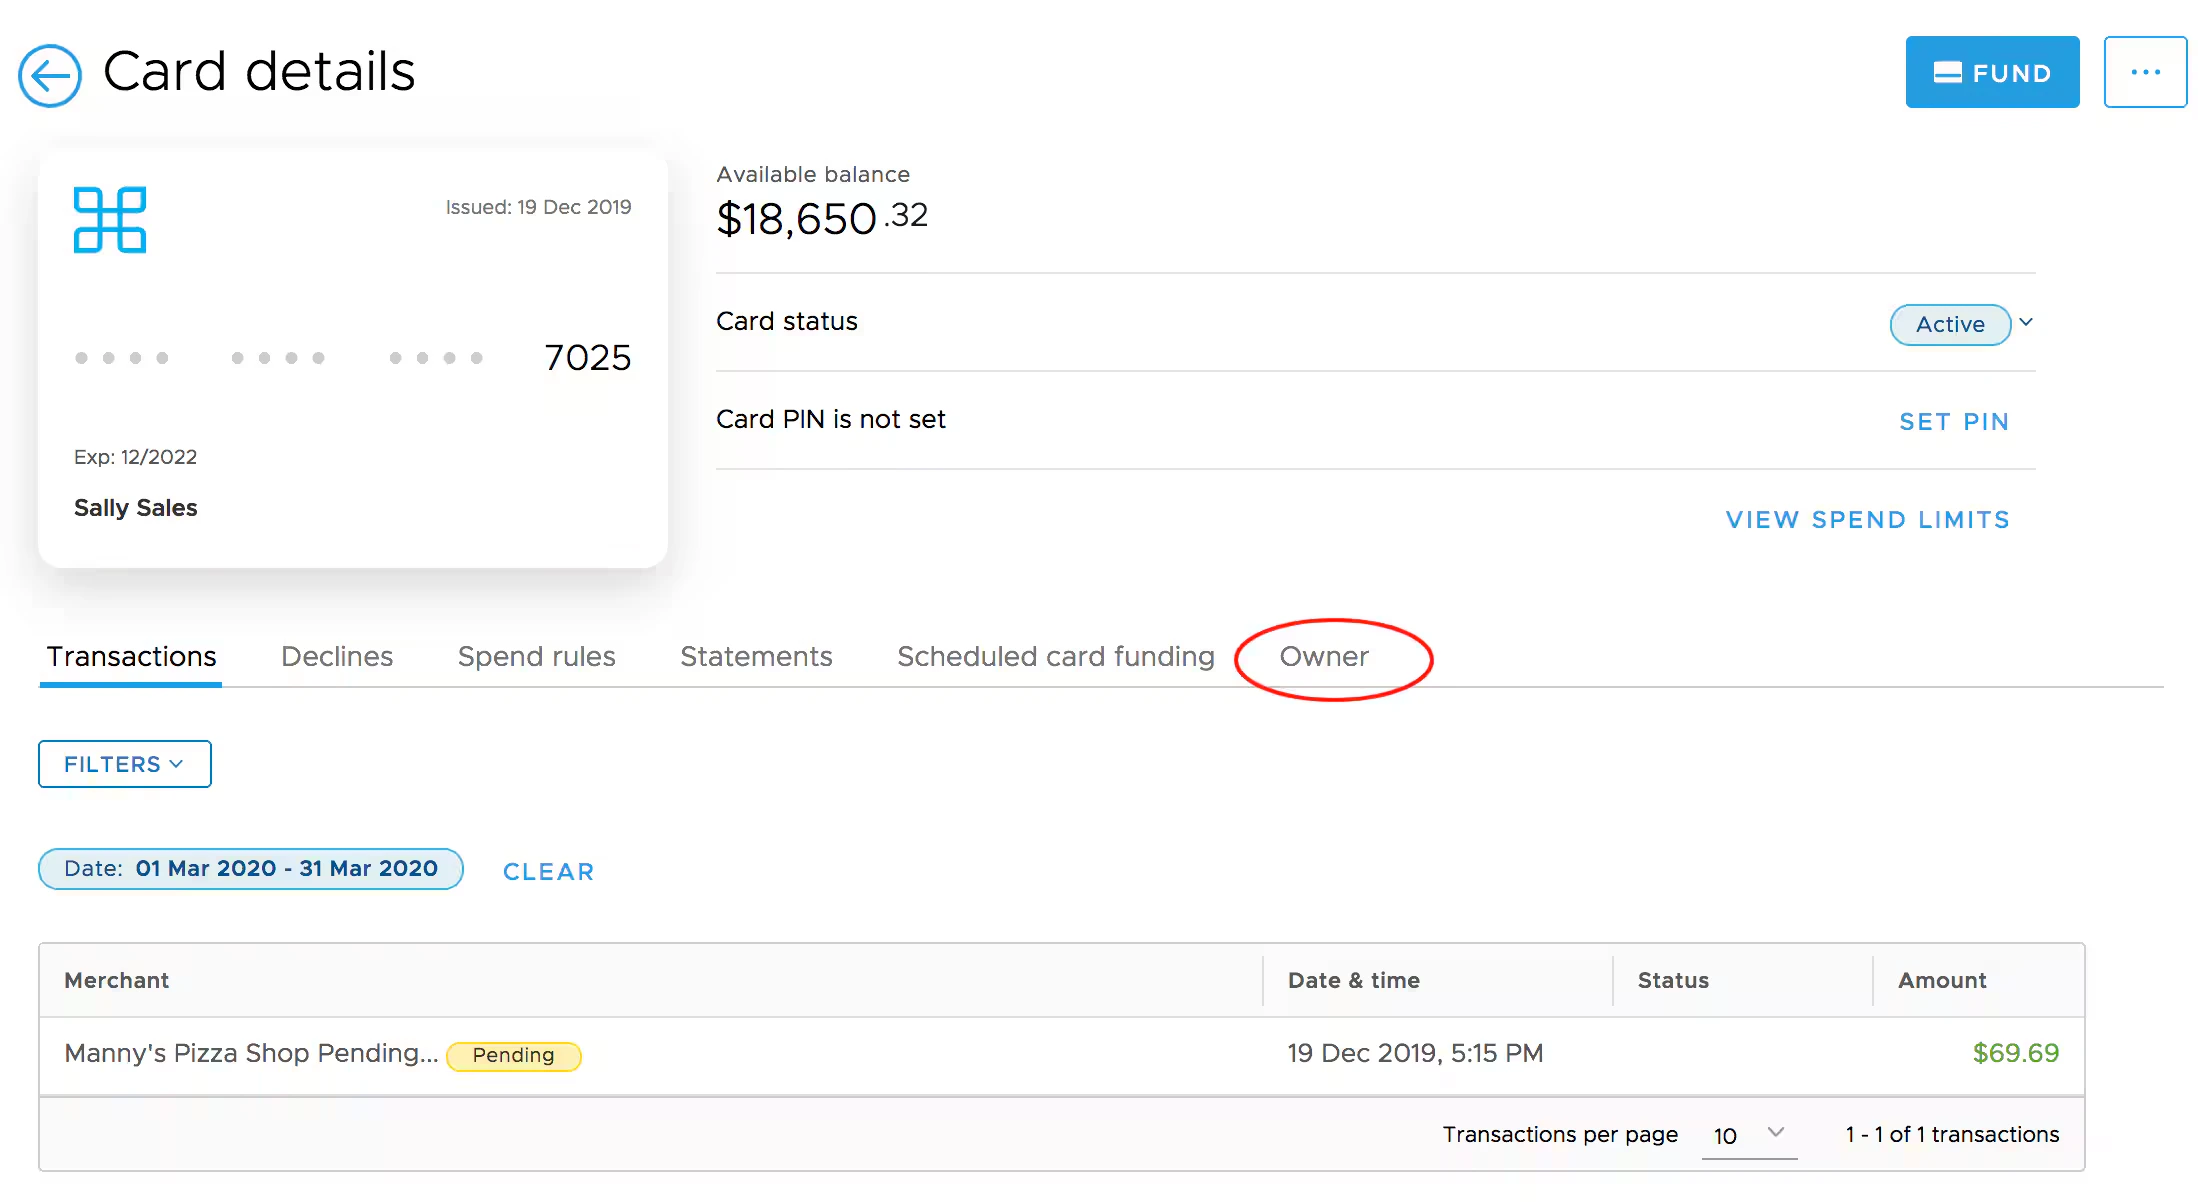
5
Click on the name of the Team Member who is the owner of the card. This opens the Team Member profile page.
6
Click the “Edit” button to edit the profile
7
Select the Group from the dropdown menu to edit the Group field, or click “Create New”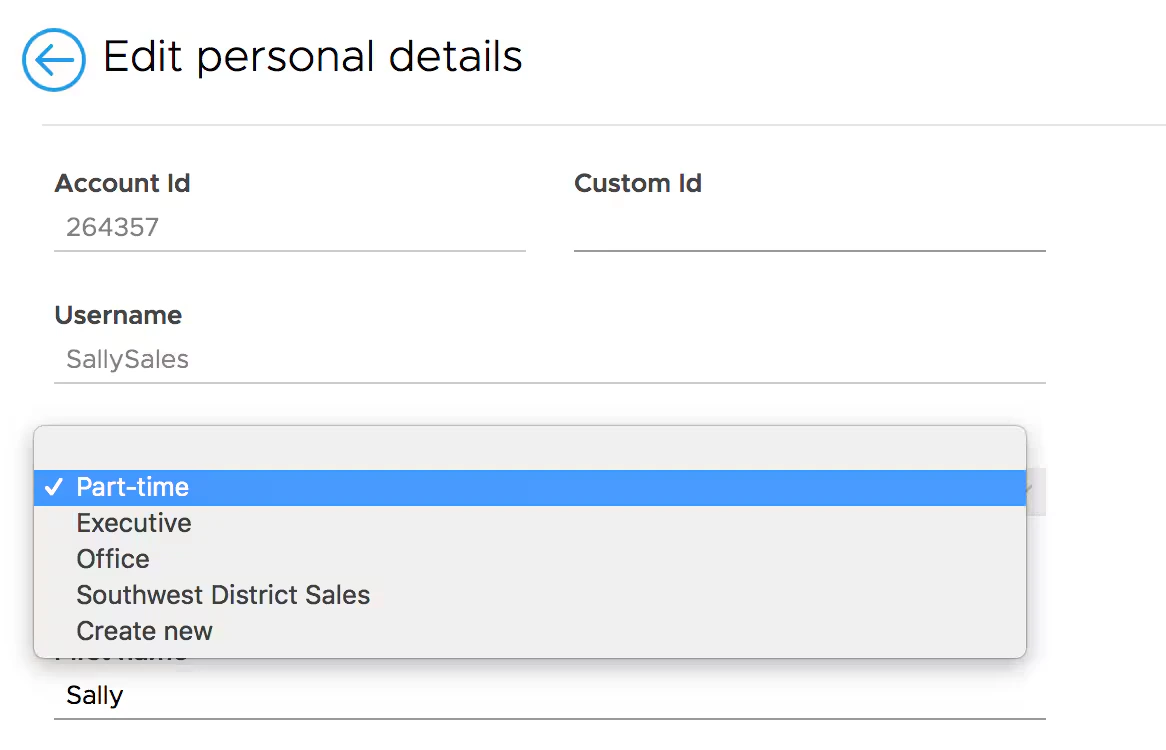
Note:Selecting the blank option (or “none” at top) from the dropdown menu will remove the cardholder from a Group.
Note:Once you select the Group for an individual cardholder from the dropdown menu, the change automatically saves, and you can navigate back to the Team Member’s profile to review the change.
Pencil icon to edit